Willkommen beim Lernprogramm, Heute lernen wir das Schritte zum Zeichnen einer Maus für Kinder. Beginnen wir mit einigen interessanten Fakten. Eine Maus ist ein kleines Nagetier. Es gibt mehr als 30 Mausart.
- Wie zeichnet man eine Kuh
- Wie man einen Schmetterling zeichnet
- Wie zeichnet man einen Drachen
- Wie man eine Rose zeichnet
- Wie zeichnet man einen Hund
- Wie man ein Gesicht zeichnet
- Wie man Lippen zeichnet
- Wie man Augen zeichnet
- Wie man Haare zeichnet
- Wie zeichnet man eine Schlange
- Wie zeichnet man eine Eule
- Wie man einen Baum zeichnet
- Wie man Wolken zeichnet
- Wie man ein Pferd zeichnet
- Wie man Menschen zeichnet
Sie sind nachtaktive Tiere, obwohl sie schlecht sehen, Sie kommen mit ihrem ausgeprägten Hör- und Geruchssinn zurecht. Sie nutzen ihre Schnurrhaare, um jede Temperaturveränderung zu spüren und ihnen dabei zu helfen, die Oberfläche zu erkennen, auf der sie laufen. Diese Nagetiere werden am häufigsten für wissenschaftliche Experimente jeglicher Art verwendet. Ihre Lebensdauer beträgt ca 2 Jahre, aber aufgrund der großen Anzahl an Raubtieren überleben sie normalerweise nur in der Nähe 6 Monate. Walt Disney war der erste, der eine Maus als Figur verwendete, d. h. Mickey Mouse in Cartoons für Kinder.

Genug Wissen über Mäuse, Ich finde. Ohne weitere Verzögerung, Kommen wir zu unserer Zeichnung.
Wie zeichnet man eine Maus für Kinder??
Schritt 1 Zeichnen Sie einen Umriss für den Körper der Maus, der einfach der Form eines Felsens ähnelt.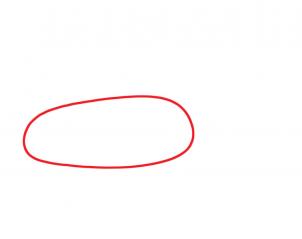
Schritt 2 Verwenden Sie nun die Gliederung, Wir zeichnen den echten Körper der Maus. Zeichnen Sie eine spitze Spitze für die Nase, gefolgt von einer sanften Kurve für den Kopf. Zeichnen Sie dann das Ohr, das eine Art mittelgroßer Kreis darstellt. Danach, Fahren Sie vom Ohr bis zum dicken, fetten Körper der Maus fort.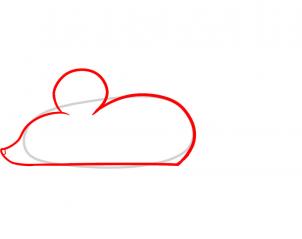
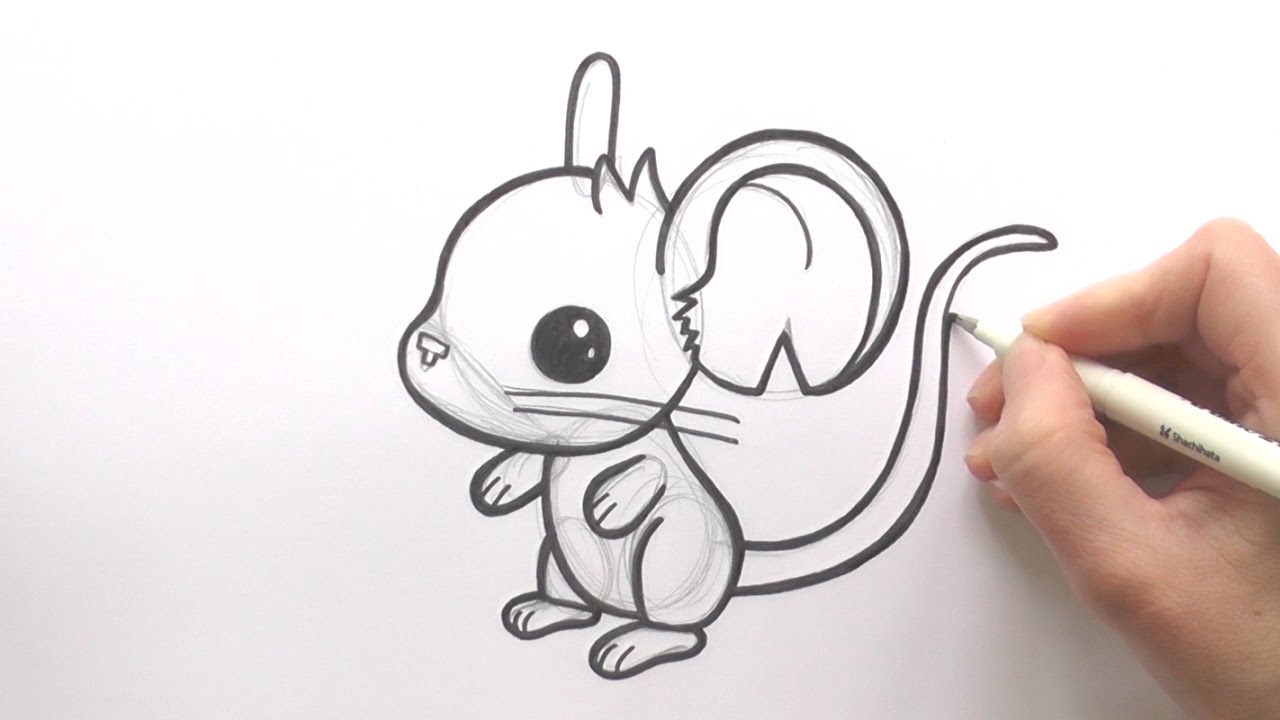
Schritt 3 Zeichnen Sie ein kleines kreisförmiges Auge und geben Sie die Reflexionen an. Zeichnen Sie einige Schnurrhaare und einen langen, gewellten Schwanz. Löschen Sie alle unerwünschten Linien in der Abbildung.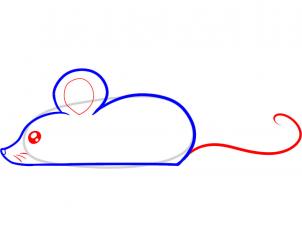
Schritt 4 Jetzt haben Sie Ihre Cartoon-Maus fertig. Denken Sie nach und geben Sie ihm einen Namen.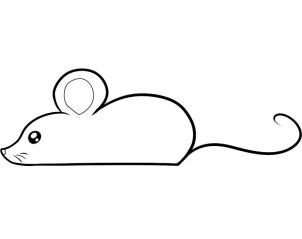
Wie man Schritt für Schritt eine Maus zeichnet?
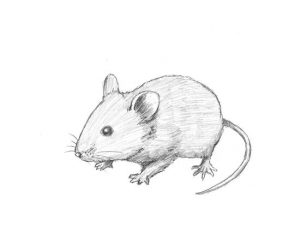
Die Figur, die wir in den obigen Schritten gezeichnet haben, war lediglich eine Lernfigur für die Kinder. Der nächste Schritt besteht darin, eine realistischere Maus zu zeichnen. Ich werde mit Ihnen die Schattierungstechniken teilen, die Sie befolgen müssen, um dies zu erreichen. Wenn Sie ein Anfänger sind, sind Sie hier genau richtig, denn indem Sie die Schritte befolgen, die ich unten beschrieben habe, Sie können ganz einfach eine realistische Maus zeichnen.
Zeichnen Sie eine Maus für Anfänger
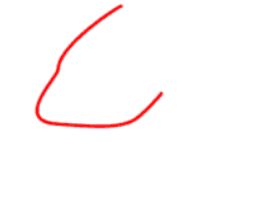
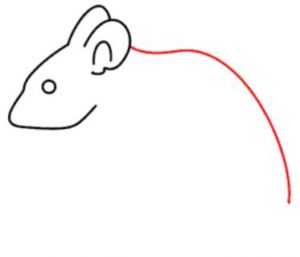
Schritt 1 Zeichnen Sie eine geneigte U-ähnliche Form für den Kopf mit einer leicht spitzen Spitze für die Nase.
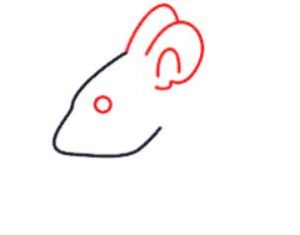
Schritt 2 Zeichnen Sie ein kleines kreisförmiges Auge und zwei lange Ohren am Hinterkopf.
Schritt 3 Zeichnen Sie ausgehend vom Ohr eine lange geschwungene Linie, um die Rückseite des Körpers zu formen.
Schritt 4 Von der Unterseite des Kopfes, Zeichnen Sie wie abgebildet eine kleine Halslinie und ein kurzes Vorderbein.
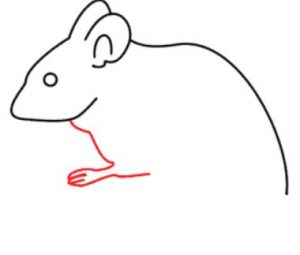
Schritt 5 Nach dem Vorderbein, Zeichnen Sie weiterhin eine Gerade, um die Unterseite des Bauches zu formen, und zeichnen Sie dann die dünnen und kurzen Hinterbeine. Setzen Sie die Linie fort, aber lassen Sie sie nicht auf die Rückseite des Oberkörpers treffen, Lassen Sie etwas Platz für den Schwanz.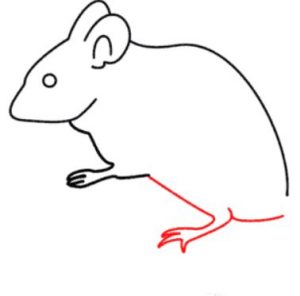
Schritt 6 Aus der Lücke, ziehen 2 parallel gekrümmte lange Linien, die zum Ende hin dünner werden und sich verbinden.
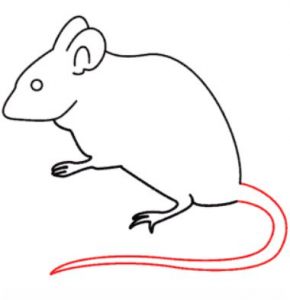
Schritt 7 Jetzt müssen wir nur noch die restlichen Vorder- und Hinterbeinpaare zeichnen.
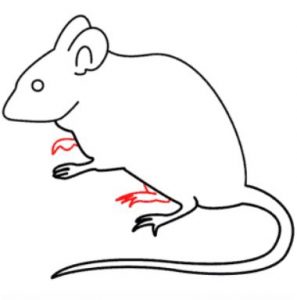
Schritt 8 Sie haben Ihre Maus bereit, d. h. Die Struktur ist fertig, aber um sie realistisch zu machen, muss sie schön schattiert werden, Folgen Sie also dem Bild unten, um Ideen für die Schattentechnik zu erhalten.