Salut les gens!! Suivez et lisez l'article, vous obtiendrez des conseils et des étapes incroyables pour dessine les oreilles.
Comment dessiner des oreilles étape par étape
Étape 1: Dessine deux cercles, un grand et un petit. Positionne le grand cercle au-dessus du petit comme indiqué, en laissant un peu d'espace au milieu d'eux, au moins maintenir l'espace 2 pouces, pas moins que 2 pouces.
- Comment dessiner un canard
- Comment dessiner une hotte
- Comment dessiner un graffiti
- Comment dessiner une chèvre
- Comment dessiner un chevalier
- Comment puiser de l'eau
- Comment dessiner une tortue
- Comment dessiner un dauphin
- Comment dessiner un Shopkins
- Comment dessiner une tresse
- Comment dessiner un panda
- Comment dessiner un renard
- Comment dessiner un ballon de football
- Comment dessiner des fourrures
- Comment dessiner un cochon
- Comment dessiner des bandes dessinées
- Comment dessiner un diamant
- Comment dessiner une citrouille
- Comment dessiner des oreilles d'animaux
- Comment dessiner un ovale
- Comment dessiner un emoji
- Comment dessiner un cube
Étape 2: Esquissez deux lignes reliant les cercles. Ces formes vous aideront à donner à l'oreille une formation essentielle. C’est peut-être l’étape la plus essentielle du processus, alors sois clair dans ton esprit, tes répliques sont à la hauteur.
Étape 3: Commencer à dessiner l'oreille. Crayon dans un autre ensemble de grands et de petits cercles, Ajoutez en outre deux lignes courbes, vous êtes libre d'utiliser votre créativité et d'utiliser votre imagination pour donner la forme..
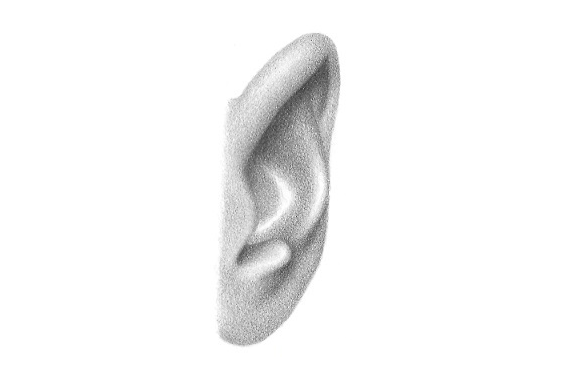
Étape 4: Préciser l'oreille. Comme c'est quelque chose qui vous est visible partout, ce serait mieux si vous recherchez un modèle particulier et faites l'oreille en fonction de celui-ci, sinon vous pouvez toujours vous diriger vers Google. Vous y trouverez de bonnes photos que vous pourrez suivre pour dessiner l'oreille..
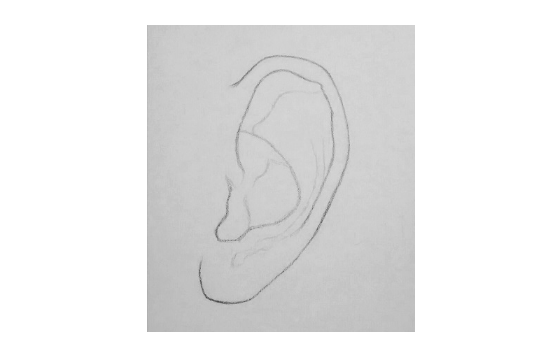
Étape 5: Essuyez les lignes directrices après avoir délimité les oreilles. Vous pouvez également faire de l'ombrage, si vous n'êtes pas à l'aise ou si vos mains ne maîtrisent pas correctement les couleurs, il serait préférable que vous montiez l'ombrage. Cela ne nécessite pas beaucoup de compétences et vous pouvez facilement ombrer les oreilles.
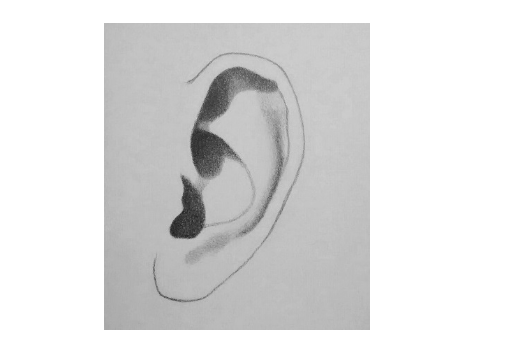
Étape 6: Maintenant c'est à votre créativité. Vous avez la structure, vous pouvez maintenant faire des ombres ou des colorations.. Votre travail est terminé. Pour être meilleur dans ce domaine, vous devez vous entraîner. C'est la seule clé de la maîtrise.
Des oreilles faciles à dessiner
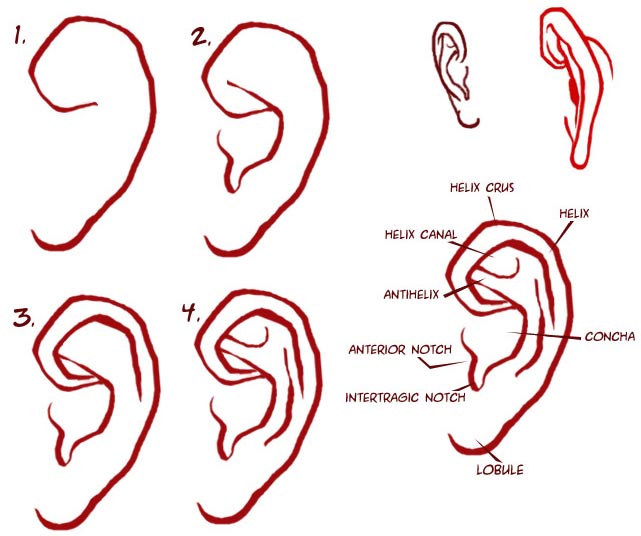
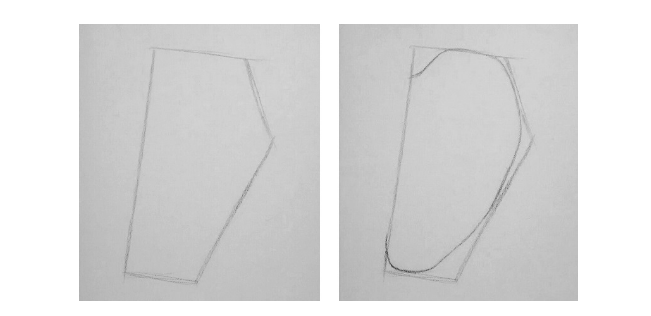
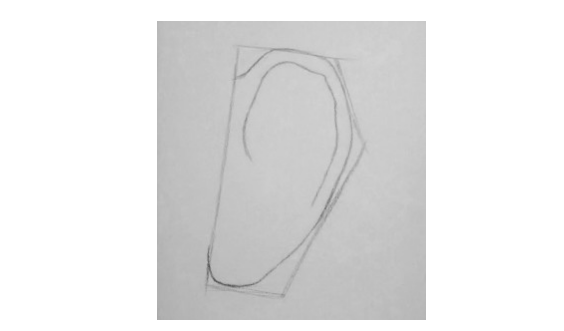
Étape 1: Esquissez la forme d'une oreille. Vous pouvez facilement tracer la forme de l'oreille, soyez clair à l’esprit que le lobe de l’oreille est plus petit en partie que l’hélice.
Étape 2: Esquissez deux courbes pour souligner les plis les plus importants de l'oreille. La première courbe doit être de la partie médiane vers la partie supérieure de l'oreille. Vous pouvez utiliser votre main librement pour rendre la courbe lisse ou aussi irrégulière que vous le souhaitez ou dont vous avez besoin.. Il ne faut pas oublier de laisser une petite pièce sur le pourtour.
La deuxième courbe est censée sortir de la première et avoir un fond en forme de larme. Enroulez la courbe pour lui donner la silhouette ou formez un rabat appelé tragus.. Assurez-vous de laisser une bonne quantité d'espace en bas pour le lobe de l'oreille..
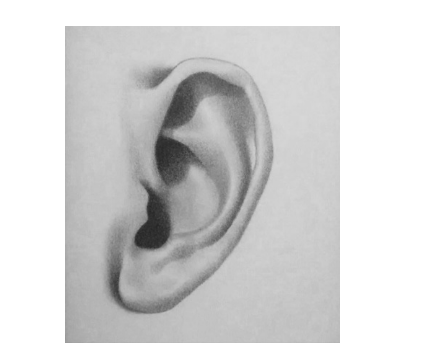
Étape 3: Maintenant, il s'agit de la préparation de l'ombrage. Vos mains sont libres pour protéger l'oreille. Mais assurez-vous que votre imagination donnera un bel aspect à la structure que vous avez réalisée.. Vous pouvez ombrer avec différentes nuances de crayons. C'est l'expérience qui viendra se jouer maintenant. Vous devez beaucoup vous entraîner pour clarifier vos concepts sur l'ombrage. Cette chose ne peut être enseignée nulle part mais il faut apprendre soi-même.
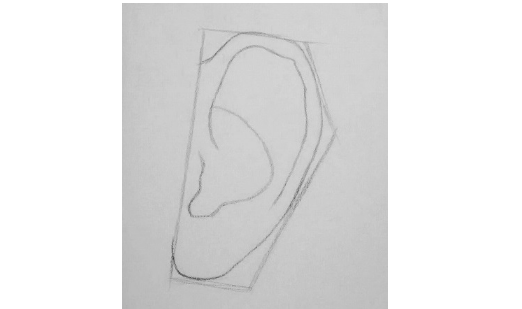
Étape 4: Finition. Fait et dépoussiéré.
Comment dessiner des oreilles sur un visage
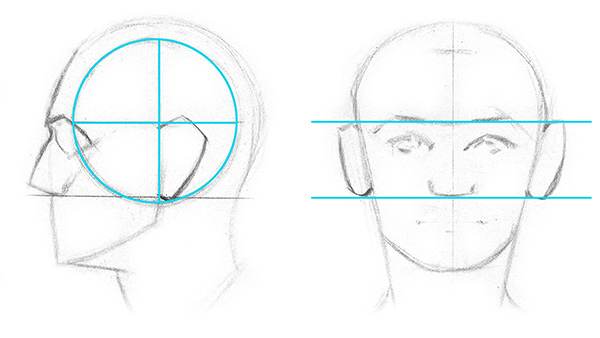
Généralement, lorsque vous dessinez un visage, vous devez dessiner l'oreille au milieu du dessin du visage.. A ce moment-là, l'accent est mis sur le visage afin que vous puissiez utiliser les techniques fournies ici avec un haut niveau de créativité. L'accent est mis sur le visage, vous devez dessiner une petite oreille. Vous pouvez utiliser les techniques fournies ici pour dessiner des oreilles., facile à dessiner les oreilles et comment dessiner les oreilles de face.
Si vous dessinez un visage depuis une vue latérale, puis l'oreille vient vers l'avant, vous pouvez alors utiliser les techniques fournies ci-dessous; de face pour dessiner les oreilles, dessiner l'oreille. Mais vous devez réduire la taille et faire preuve de logique en imaginant à quoi ressemblerait une oreille..
De face pour dessiner les oreilles
Étape 1: Commencez par dessiner une forme d'oreille. Ce serait mieux si vous optiez pour un crayon HB émoussé.
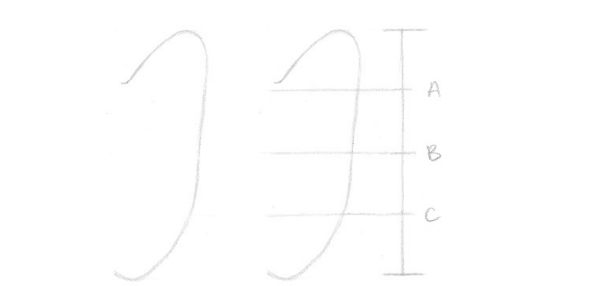
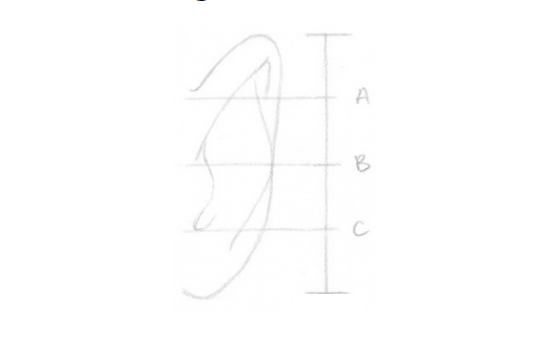
Maintenant, ce que vous devez faire ensuite est de déterminer la longueur de votre croquis et de créer une règle à côté de celui-ci.. Brouillon 3 lignes à l'aide d'une règle, briser la structure en 4 sections égales. Il vaudrait mieux faire référence à vous si j'étiquete la ligne. Donc, étiquetons la ligne comme A, B et C.
Étape 2: Maintenant, L'étape suivante consiste à dessiner une grande forme de crochet en commençant par la ligne B et en terminant par la ligne A..
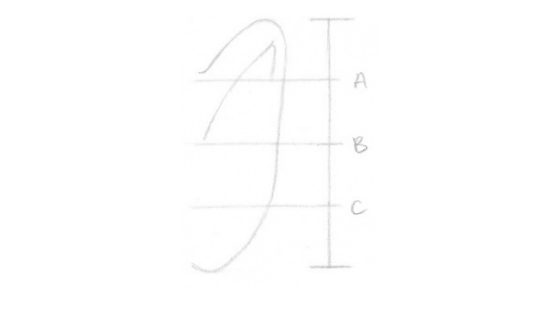
Étape 3: Ajoutez le Tragus de l'année, d'un seul coup sans casser en partant de la ligne B terminer jusqu'à la ligne C avec un petit crochet. Le tragus est le petit lambeau devant le conduit auditif, alors maintenant vous pouvez facilement imaginer par où commencer et où finir.
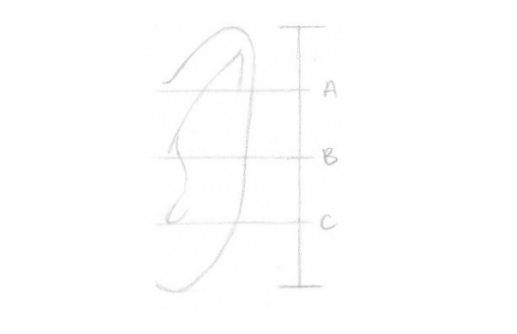
Étape 4: Construisez un grand pli en dessinant une courbe à l'extrême droite qui commence au sommet de l'oreille et se termine en dessous de la ligne C.. Il faut laisser un peu d'espace pour le lobe de l'oreille.
Étape 5: Esquissez une petite forme de crochet, en gros, nous dessinons un anti-tragus. Au milieu des deux lignes que tu as tracées maintenant, esquissez une grande figure en crochet qui se trouve et se termine sur la ligne C.
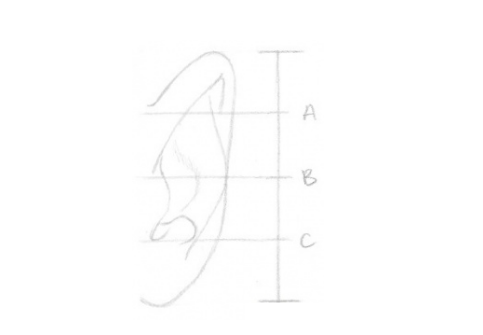
Étape 6: Esquissez une courbe au centre de l'oreille, évitez-lui de le rendre parallèle à ce que vous dessinez étape par étape 4.
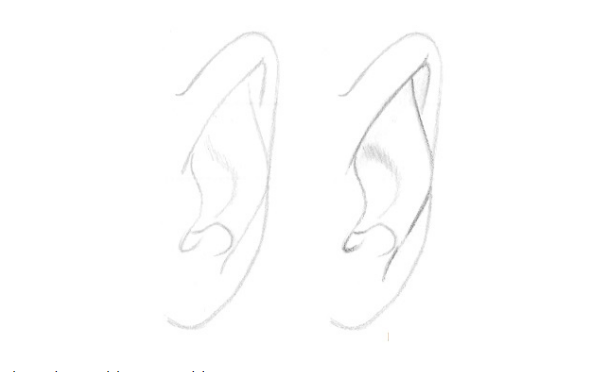
Étape 7: Maintenant, tu es prêt à dessiner. Vous devez comprendre et utiliser votre imagination pour dessiner. Vous avez les mains libres pour dessiner où dessiner l'obscurité ainsi que où dessiner la lumière..
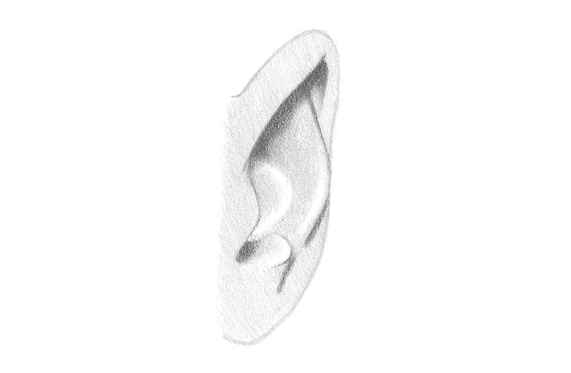
Étape 8: Fait et dépoussiéré. Votre travail est terminé. Toutes les étapes ont été fournies mais la partie ombrage a été laissée à votre discrétion car cela dépend de la pratique et de la manière dont vous souhaitez donner le look à l'oreille..