Hey folks!! Follow and read the article you will get some amazing tips and steps to draw the ears.
How to Draw Ears Step by Step
Step 1: Draw two circles, one large in addition to small one. Positions the large circle above the small one as revealed, leaving a little space amid them at least maintain the space 2 inches, not less than 2 inches.
- How to Draw a Duck
- How to Draw a Hoods
- How to Draw a Graffiti
- How to Draw a Goat
- How to Draw a Knight
- How to Draw a Water
- How to Draw a Turtle
- How to Draw a Dolphin
- How to Draw a Shopkins
- How to Draw a Braid
- How to Draw a Panda
- How to Draw a Fox
- How to Draw a Soccer Ball
- How to Draw Furries
- How to Draw a Pig
- How to Draw Comics
- How to Draw a Diamond
- How to Draw a Pumpkin
- How to Draw an Animal Ears
- How to Draw an Oval
- How to Draw an Emojis
- How to Draw a Cube
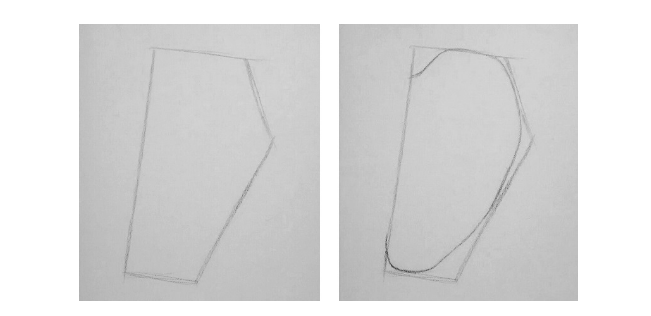
Step 2: Sketch two lines linking the circles. These shapes will help you to give out the ear an essential formation. This is perhaps the mainly essential stage of the process, so be clear in your mind your lines are up to par.
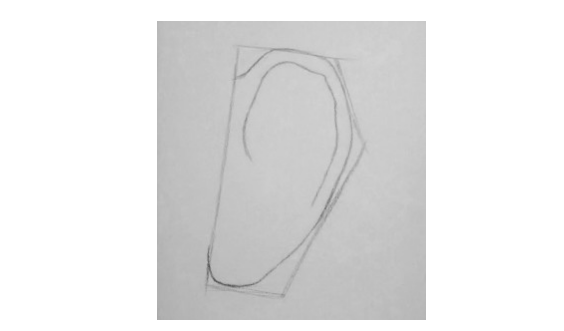
Step 3: Initiate sketching the ear. Pencil in one more set of large as well as small circles, furthermore add two curved lines you are free to use the creativity and use your imagination to give the shape.
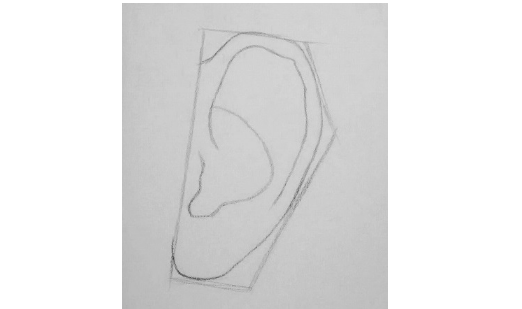
Step 4: Specify the ear. As it is something that is visible to you everywhere, it would be better if you look up to particular model and make the ear according to that or else otherwise you can always head towards the Google. There you can find some good photos which you can follow to sketch the ear.
Step 5: Wipe away the guidelines subsequent to outline the ears. You can do some shading also, if you are not comfortable or your hands are not upon colors properly it would be better if you go up with the shading. It does not require many skills and you can easily shade the ears.
Step 6: Now it’s up to your creativity. You have the structure now you can do shading or coloring. Your work is finished. To be better at this you have to practice. That’s the only key to mastery.
Easy to Draw Ears
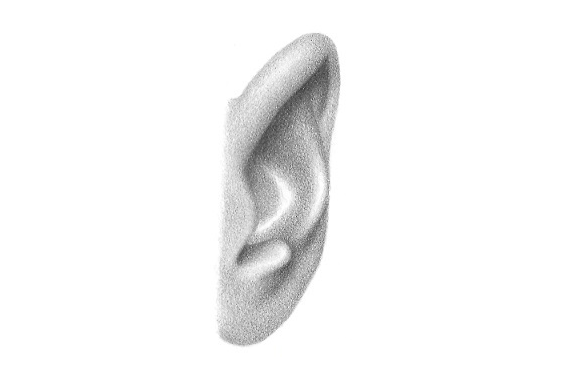
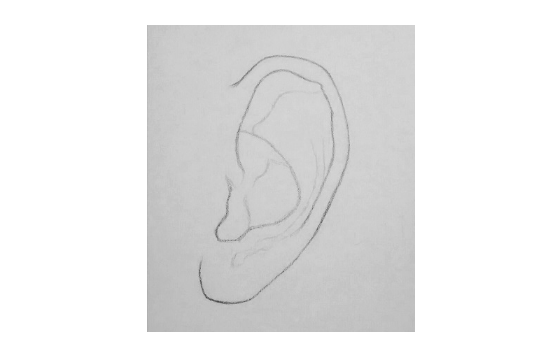
Step 1: Sketch the shape of an ear. You can easily outline the shape of the ear, be clear in mind that the ear lobe is smaller in portion to helix.
Step 2: Sketch two curves to point out the most important folds within the ear. First curve must be from the middle part to the top part of the ear. You can use your hand freely to make the curve smooth or as jagged you want or required to you. You must not forget to leave a small room around the edge.
The second curve is supposed to come out from the first one as well as have a tear shaped bottom. Wrap up the curve to give it the figure or form a flap that is acknowledged as tragus. Be certain that you leave a fine quantity of room at the bottom for the ear lobe.
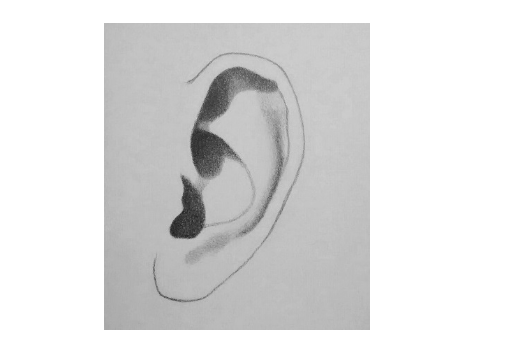
Step 3: Now, it comes to the shading preparation. Your hands are free to shade the ear. But make it sure that your imagination will give a nice look to the structure you made. You can shade with different shades of pencils. It is the experience that will come to play now. You have to practice a lot to clear your concepts on shading. That thing cannot be taught anywhere but one has to learn self.
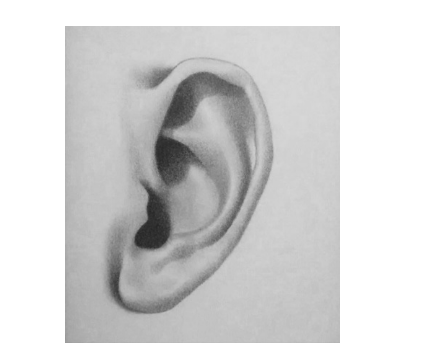
Step 4: Finish. Done and dusted.
How to Draw Ears on a Face
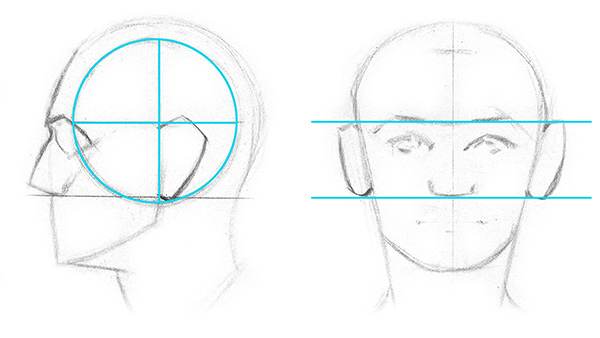
Generally when you are sketching a face you have to sketch the ear amid the sketching of the face. At that point of time, the main focus is on the face so you can use techniques provided here with the high level of creativity. The main focus is on face you have to draw a small ear. You can use the techniques provided here on how to draw ears, easy to draw ears and how to draw the ears from front.
If you are sketching a face from side view, then the ear comes to front part then you can use the techniques provided below; from the front to draw ears, to sketch the ear. But you have to reduce the size and use logic with the imagination that how an ear would look like.
From the Front to Draw Ears
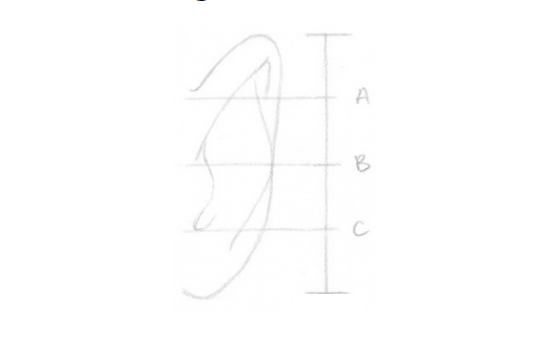
Step 1: Start with sketching an ear shape. It would be better if you go for a blunt HB pencil.
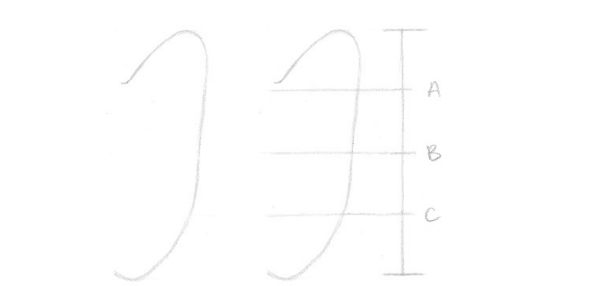
Now, what you have to do next is to determine the length of your sketch as well as create a ruler at the side of it. Draft 3 lines with the help of ruler, breaking the structure into 4 equal sections. It would be better to refer to you if I label the line. So, let’s label the line as A, B and C.
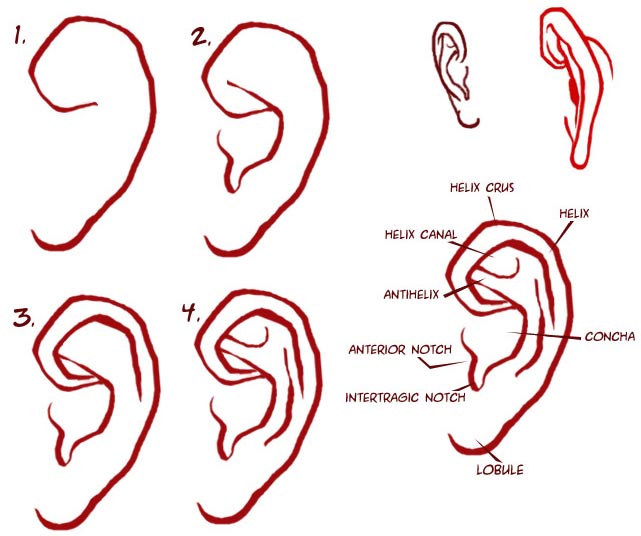
Step 2: Now, next step is to draw a large hook shape starting from line B and it ends at line A.
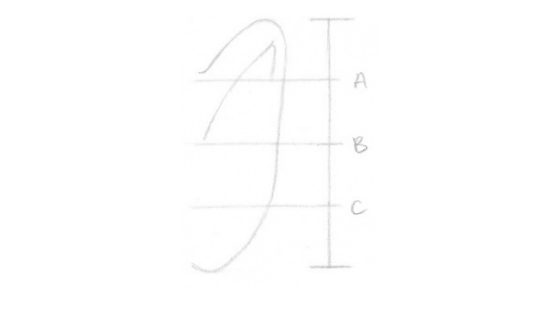
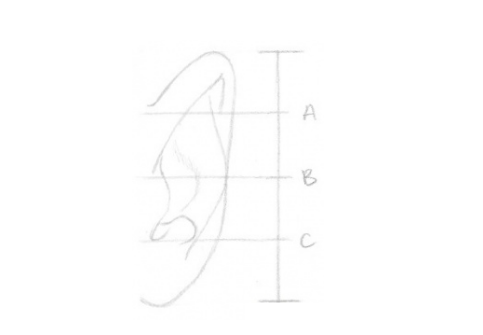
Step 3: Add the Tragus of the year, in one stoke without breaking starting from line B end it to the line C with a small hook. Tragus is the small flap in front of the ear canal, so now you can imagine easily where to start and where to end.
Step 4: Construct a large fold sketching a curve to the far right that initiates at the top of the ear and that ends below line C. You have to leave some space for the ear lobe.
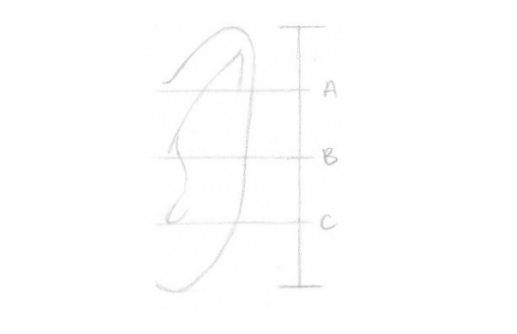
Step 5: Sketch a small hook shape, basically we are sketching anti-tragus. Amid the two lines you drew now, sketch a large hook figure that sits and ends upon line C.
Step 6: Sketch a curve in the center of the ear, refrain it from making it parallel to what you sketch in step 4.
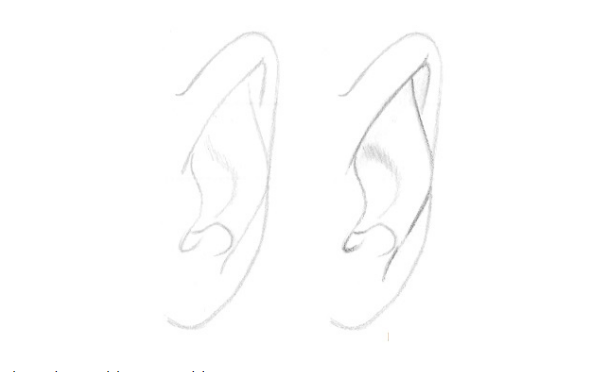
Step 7: Now, you are ready to sketch. You have to understand and use your imagination to sketch. You have your hands free to sketch where to sketch dark as well as where to sketch light.
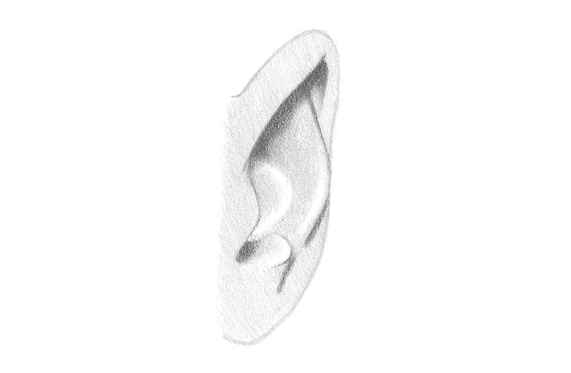
Step 8: Done and dusted. Your work has been finished. All the steps has been provided but the shading part has been left up to you because it depends on the practice and how you want to give the look to ear.