
Buze Desen: Bine ați revenit copii din nou. Cum merge exercițiul tău de desen? I will again remind you little masters that drawing is skill which showcases your imagination and creativity. The better your imagination level, greater will be the appreciation that you will receive.
- Cum să desenezi un Pokemon
- Cum să desenezi un Pikachu
- Cum să desenezi o gură
- Cum să desenezi o mână
- Cum să desenezi un Superman
- Cum să desenezi o stea
- Cum să desenezi un Sonic
- Cum să desenezi o minge de baschet
- Cum să desenezi un creier
- Cum să desenezi un Cupcake
- Cum să desenezi un Emoji
- Cum să desenezi un Sărut
- Cum să desenezi un șoarece
- Cum să desenezi un nas
- Cum să desenezi un leu
- Cum să desenezi o maimuță
- Cum să desenezi o mașină
- Cum să desenezi un Deadpool
- Cum să desenezi un căprior
- Cum să desenezi un Doraemon
Never get disheartened when are unable to draw something, always be motivated. Keep on trying until you achieve your goal. Step by step you will surely master it. If you face any difficulties, without a second thought visit our site. I am sure we would be able to show you the simplest method to complete your task.
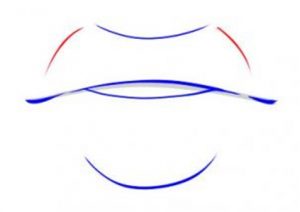
Drawing lips is the first step before drawing a face. First you need draw each components of a face individually before drawing a complete face to maximize the details and give it a realistic look. Lips of men and women vary in shapes, so different techniques are followed to draw each of them. Lips play an important role as it depicts the mood of the person. Hence we need to know all their features to express the feelings of a person in a sheet of paper. It is easier to draw male lips as they have less curvature and their bottom lips are also not well defined.
So children enough about lips, let’s get back to doing it practically. Don’t waste a second, grab a pen and paper to start with your drawing.
How to Draw Male Lips step by step?
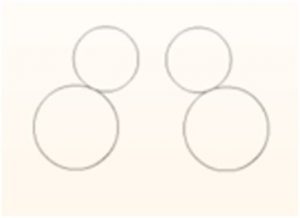
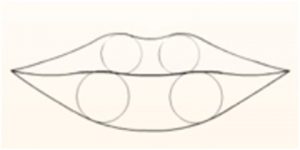
Etapa 1 Draw two small circles adjacent to each other with 2 cm gap at the centre of the page.

Etapa 2 Draw one more circle below each existing small circles diagonally. These circles are larger in size and their top edges touch the small circles.
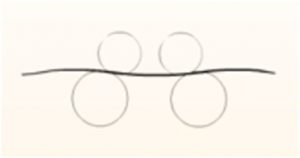
Etapa 3 Draw a wavy line horizontally in separating the pairs.
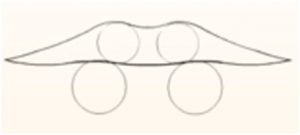
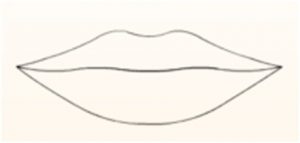
Etapa 4 Now we join the ends of the line with passing through the top edges of the circle which are symmetrical hills to form the upper lip.
Etapa 5 Now draw a simple curve below the line passing through the bottom edges of the larger circles and join it with the wavy line.
Etapa 6 Erase the unwanted circles and remove the lines.
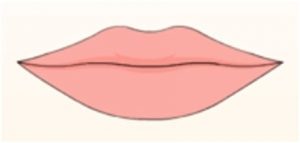
Etapa 7 Fill it with colours or give faint vertical strokes to make it more realistic.
Method to Draw Lips from the side
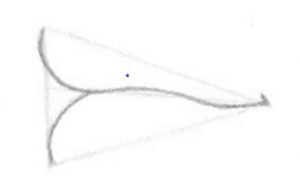
Etapa 1 The first stroke determines the position of the lip. Draw a straight line which shows normal bite i.e. the line passes through the edges of the upper and lower lip.
Etapa 2 The second stroke is drawn almost perpendicular to the first line whose angle tells us about the thickness of the upper and lower lip.

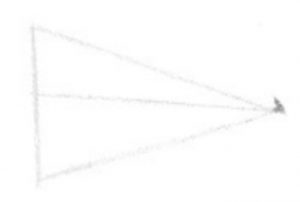
Etapa 3 Now draw a line using the lines. Height of the triangle is directly proportional to the width of the lip.
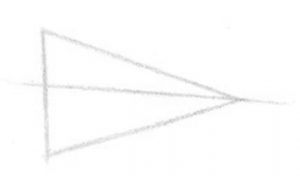
Etapa 4 We then give a small dot at the end of the triangle to show the corner of the mouth.
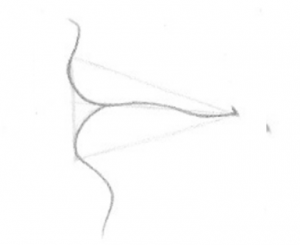
Etapa 5 Draw curve starting from the top left corner of the triangle within the half triangle to form the top lip.
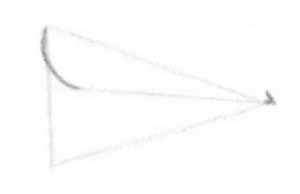
Etapa 6 Continue the line in curved manner along the middle line top divide the upper and lower lip.
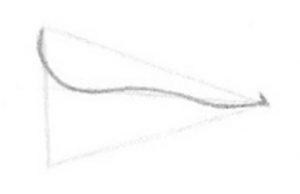
Etapa 7 Similarly now start from bottom left corner to form the lower lip.
Etapa 8 Now we draw the upper and lower lip by extending the lines in curvy shape but not too far.
Etapa 9 Draw the rims of the lip by following the sides of the triangle till you reach the corner of the mouth. Erase the outlines.
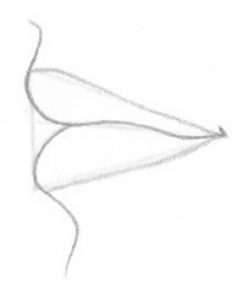
Etapa 10 Draw faint vertical lines within both the lips and shade them to complete your lips. Remember to soften the edges.
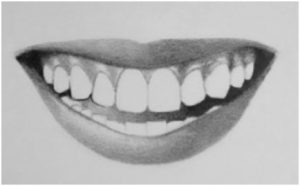
Way to Draw a Mouth with teeth
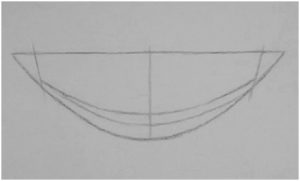
Etapa 1 Draw a half oval like shape with a vertical line in the middle. Draw two more curves just above the curve of the oval.
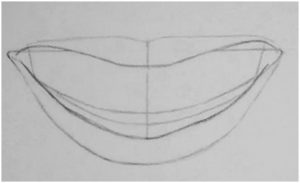
Etapa 2 Follow the outlines to draw the lips as shown in figure.
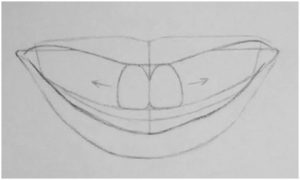
Etapa 3 First draw the front two tooth which are of egg shapes, one on the left side of the vertical line and one on the right. Continue drawing the tooth, size of each pair reduces little by little. Follow the same steps for the bottom lip.
Etapa 4 Remember that the outlines were subtle so that you can easily remove it. Now erase the outlines.
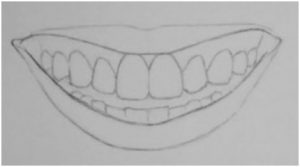
Etapa 5 Final step is to shade the lips and gums i.e. the empty spaces between the lip and the tooth. Give some additional touch-ups for your satisfaction.
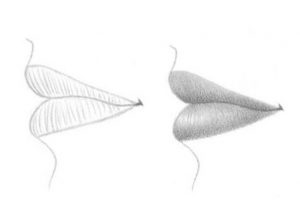
Tutorial to Draw Anime/Cartoon lips
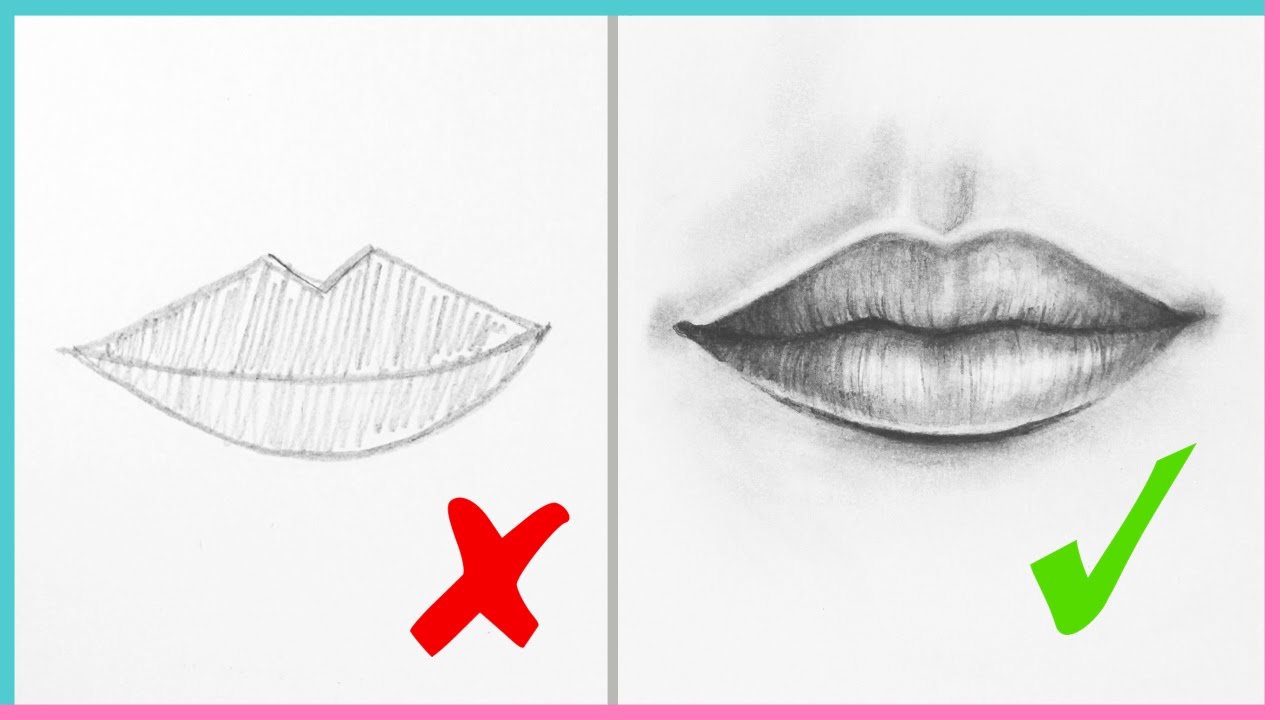
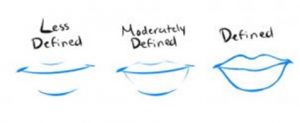
Etapa 1 As the lip gets down further, it gets more defined. The figure below explains it all.
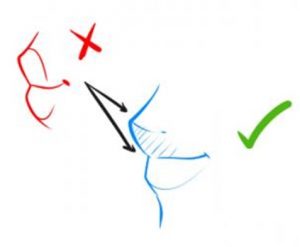
Etapa 2 The next figure shows the difference between wring and right lips.
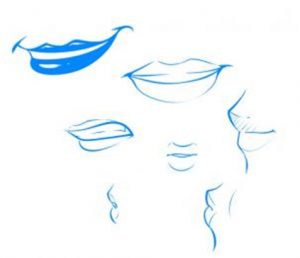
Etapa 3 We can draw a variety of anime lips according to the character we like. Below are few simple and attractive anime lips.
Etapa 4 The anime lips look best when the lower lips are more defined. I am giving you an example below for your better understanding.

Hope you got what you wanted. Don’t forget to check out my other tutorials.