ارسم البوكيمون: البوكيمونات على حق? من لا يحب البوكيمون? لا أحد منا يستطيع أن ينكر أننا أردنا أن يكون لدينا بوكيمون خاص بنا خلال طفولتنا. كانت هذه المخلوقات اللطيفة الصغيرة هي الموضوع الرئيسي للمناقشة بين أصدقائنا.
- كيفية رسم بقرة
- كيفية رسم فراشة
- كيفية رسم تنين
- كيفية رسم وردة
- كيفية رسم كلب
- كيفية رسم الوجه
- كيفية رسم الشفاه
- كيفية رسم العيون
- كيفية رسم الشعر
- كيفية رسم ثعبان
- كيفية رسم البومة
- كيفية رسم شجرة
- كيفية رسم السحب
- كيفية رسم حصان
- كيفية رسم الناس
كانت البوكيمونات من أنواع مختلفة مثل النار (تشارجر), ماء (سكويرتل), عشب, شبح (جينجار) والأسطوري. هل تتذكر هذه? قم بالتعليق على البوكيمون المفضل لديك أدناه, ثم سأخبرك بالخطوات ارسم البوكيمون المفضل لديك?
كيفية رسم البوكيمون?
رسم البوكيمونات ليس بالأمر الممل. هيكلها بسيط للغاية ويحب الأطفال رسم مثل هذا النوع من الأشياء. لذا, فكرت لماذا لا نتعلم كيفية رسمها? أنت دائمًا تبدأ مرحلة البداية في مسيرتك المهنية في الرسم بكل هذه الأنواع من الصور الصغيرة. بمجرد أن تصبح شاملاً وتثق في نفسك, ثم يمكنك إتقان أي فن. لذا, كن مبدعا دائما, استمر في التفكير بأفكار جديدة, وحاول رسمها بغض النظر عن النوع.
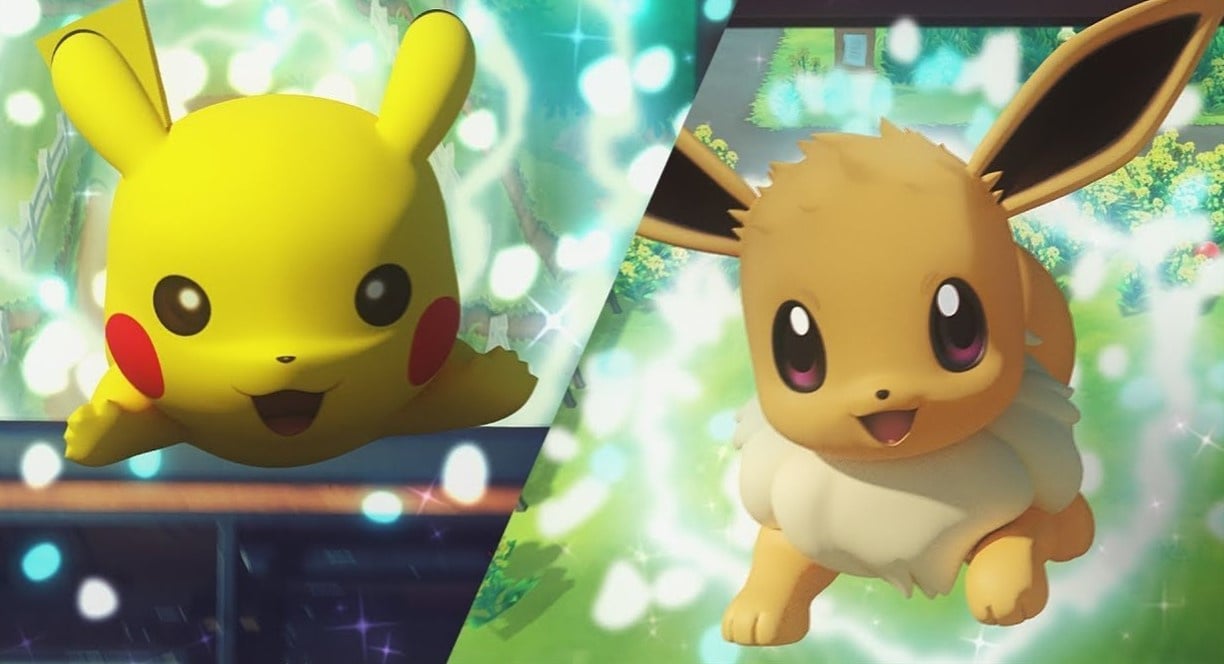
كيفية رسم بوكيمون خطوة بخطوة سهلة للأطفال?
اليوم, سنبدأ بأحد أكثر البوكيمونات المفضلة. نعم, أنت محق, إنه بيكاتشو. بوكيمون الرعد الصغير اللطيف الذي دربه الرماد. يكفي عن بيكاتشو, دعونا نعود لرسمه.
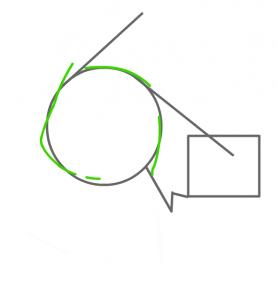
خطوة 1 للحصول على النسب الصحيحة, أولا رسم الخطوط العريضة.
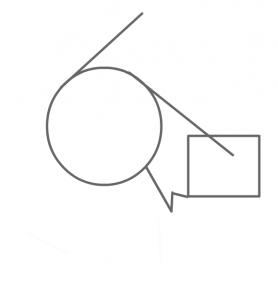
خطوة 2 ارسم دائرة يمكن أن يتبعها شكل الرأس.
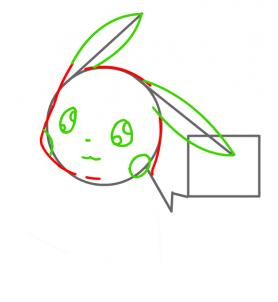
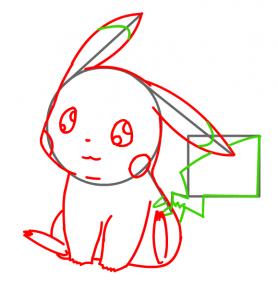
خطوة 3 سنعمل الآن مع الأذنين وملامح الوجه. الأذنين لها شكل يشبه الريشة. عيون بيكاتشو دائرية الشكل, ولكن هنا قمنا برسم شكل مثلث مستدير الزوايا. ضعي في اعتبارك أن الخدين ليسا مستديرين بشكل مثالي.
خطوة 4 الأذرع قصيرة وقوية ولها أصابع صغيرة قصيرة في النهاية أيضًا.
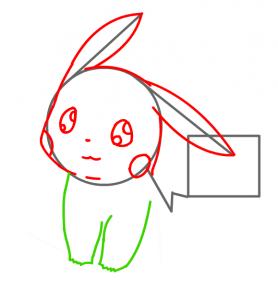
خطوة 5 شكل الجسم مختلف تمامًا حيث تغطيه ذراعه جزئيًا كما أن قدميه طويلة جدًا.
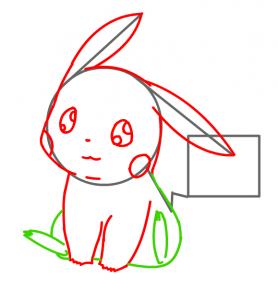
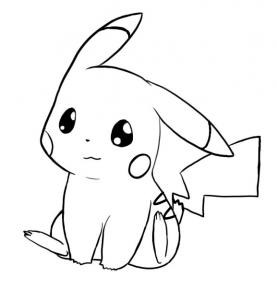
خطوة 6 الخطوة الأخيرة هي استكمال جميع الأجزاء المتبقية، أي. ارسم ذيل بيكاتشو وعلامات على الأذنين والذيل.
خطوة 7 الآن, أنت جاهز مع البوكيمون الخاص بك. آمل أن تستمتع بك 1شارع رسم البوكيمون. ترك التعليق أدناه.
كيفية رسم بوكيبول?
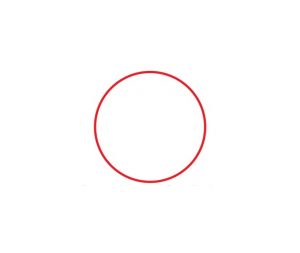
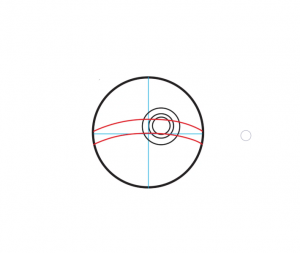
خطوة 1 ارسم دائرة مثالية.
خطوة 2 حدد المركز وارسم دائرة في الربع الأول كما هو موضح.
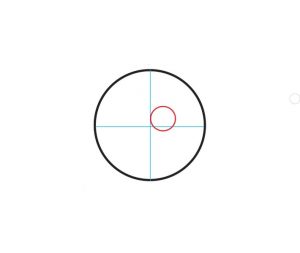
خطوة 3 ارسم دائرة أصغر بداخلها ودائرة أكبر حولها.

خطوة 4 رسم 2 خطوط منحنية من خلال جميع الدوائر الداخلية.
خطوة 5 ارسم دائرة في الزاوية اليسرى العليا.
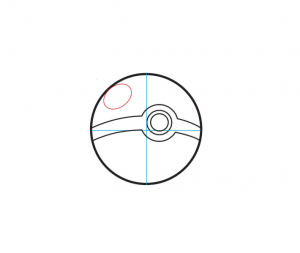
خطوة 6 ارسم شكلًا منحنيًا في المنطقة السفلية وعلى يسار الوسط كما هو موضح في الشكل.
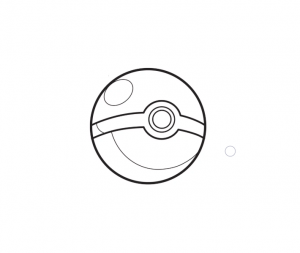
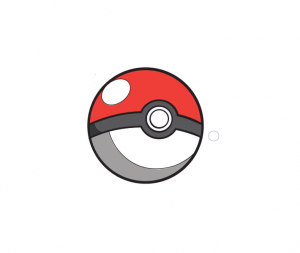
خطوة 7 جميع الخطوط العريضة لدينا جاهزة, فقط قم بتلوينها كما يجب أن نعطيها مظهرًا واقعيًا.
طريقة رسم البوكيمون الأسطوري
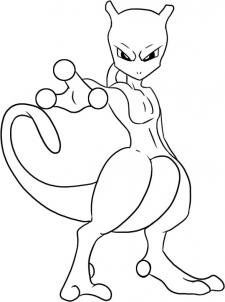
أي بوكيمون أسطوري نختار؟? ميوتو!!! وسوف نتعلم الحيل البسيطة لرسمه. أمسك قلمك واتبع خطواتي.
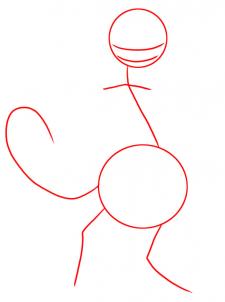
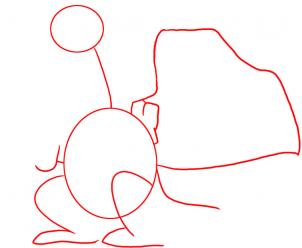
خطوة 1 أولاً سنقوم برسم دائرة للرأس ونضع علامة على الخطوط العريضة للوجه. في الخطوة التالية, سوف نقوم برسم خط مائل طويل لخط موضع الصدر ثم يتم رسم دائرة أكبر لأسفل ميوتو. بعد اكتمال ذلك يمكننا رسم خطوط الساق والذيل.
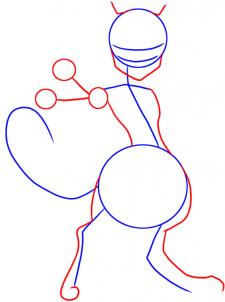
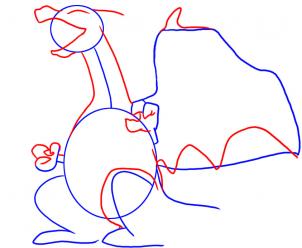
خطوة 2 سنعمل الآن على جسد ميوتو. ارسم خطوط الأذن والخطوط العريضة ليده. إعطاء شكل الماس لهيكل الوجه السفلي أو الفك. بعد هذا, سوف نرسم شكل ساقيه وكذلك قدميه.
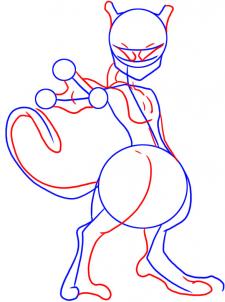
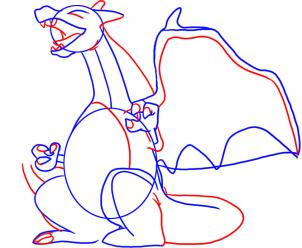
خطوة 3 نواصل العمل مع الجسم. أكمل الأذنين ثم انتقل إلى الجزء الخلفي من الرقبة. بعد ذلك ارسم شكل يده وابدأ بتفصيل راحة اليد. ثم سنجعل الذيل أكثر سمكا. ابدأ بتفصيل الصدر وأضف تحديدًا للحواجب. دافعنا هو جعله يبدو شريرًا.
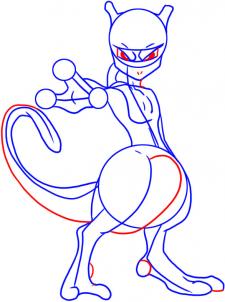
خطوة 4 هذه هي الخطوة الأخيرة وسنلون عينيه ونشكلهما ثم نعطي علامتين صغيرتين لأنفه. بعد الانتهاء من هذا, أصبحت الرقبة أكثر سمكًا وكذلك ذيله. محو جميع الخطوط العريضة التي رسمناها.
خطوة 5 تهاني! لقد أكملت حتى البرنامج التعليمي Mewtwo الخاص بك. فقط قم بتلوينها لإكمال عملك المذهل.
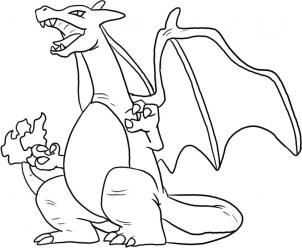
كيفية رسم بوكيمون تشارجر?
خطوة 1 أولاً سوف نقوم برسم شكل دائرة صغيرة لرأس تشارجر ثم يتم رسم دائرة أخرى للجزء العلوي من جسمه. ارسم الخطوط العريضة لجناحه ثم حدد خطوط الأطراف للذراع, اليدين, الساقين والذيل.
خطوة 2 ارسم شكل فمه المفتوح الذي يتضمن خطمه وفكه السفلي. ارسم جناحها كما هو موضح. ارسم يديه المخلبيتين اللتين تحتويان على إصبعين وإبهام واحد.
خطوة 3 الآن نعمل على تغطية فمه من الداخل ونضيف أربعة أسنان. نحاول أن نعمل بعينه أكثر قليلاً ثم نرسم ما تبقى من قرونه. أصبح الجزء الخلفي من الرقبة أكثر سمكًا ثم ارسم خطًا مضمنًا على جناحه. إعطاء شكل مثالي للذراعين ورسم خطوط صغيرة لإظهار المخالب على اليدين والقدمين, ثم أخيرًا أنهي ذيله بمزيد من التفاصيل والعمق.
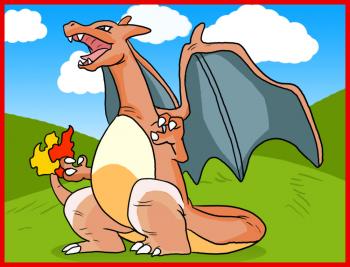
خطوة 4 ارسم مقلة عين ثم قم بتفصيل غطاء فم تشارجر. أكمل الجناح على اليسار وابدأ بتفصيله أيضًا ثم قم بوضع علامات تشبه الجلد على رقبته وذيله. الانتهاء من شكل ذيله وتغطيته بالنار. محو كافة الخطوط العريضة من الخطوة 1.
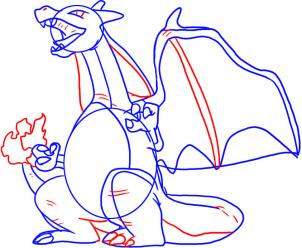
خطوة 5 لقد تعلمت بنجاح كيفية رسم Charizard. فقط قم بتلوين صورتك لتبدو حقيقية.