How to Draw Deer: Wow, deer right? Deer are the herbivore mammals belonging to the Cervidae family. The species of deer are quite variant ranging from small to very large. The largest deer is called a moose. They are found everywhere except Australia and Antarctica.
- How to draw a cow
- How to draw a Butterfly
- How to draw a dragon
- How to draw a rose
- How to draw a dog
- How to draw a face
- How to draw lips
- How to draw eyes
- How to draw hair
- How to draw a snake
- How to draw a owl
- How to draw a tree
- How to draw clouds
- How to draw a horse
- How to draw People
They are very social and move in groups referred as herds. Their diet comprises only of grass and leafs. Their jumping and swimming abilities are appreciable. They start walking within half an hour of their birth. The male deer grows new antlers every year. Their listening power is far better than humans which help them to sense their predators. They are the most common food of the predators. Their life span is around 20yrs which is decreasing day by day. Now it’s our time to learn how to draw deer.

How to Deer?
I have practiced many ways to draw a deer. I am sharing the most effective way to draw a deer which looks realistic as well. Always keep in mind that whatever I teach you have to try to think of a better way to modify the picture. Then only your skills will increase. Are following my tips carefully? Do you sketch anything good that comes into your mind? Even if you think of some deep thoughts which you can sketch out, it can take the form of abstract art. So keep on practicing various things.
How to Draw Deer for Kids?
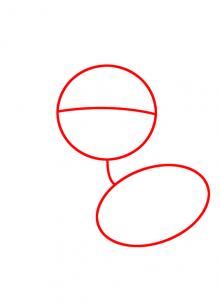
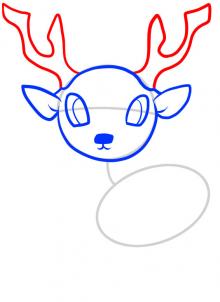
Step 1 Draw a circle for the head and an oval below it for the body. Connect both of them with a single line to form the neck.
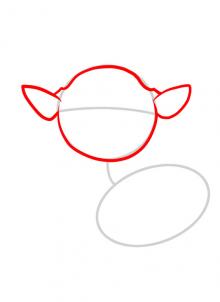
Step 2 Draw the basic shape of the head including small ears.
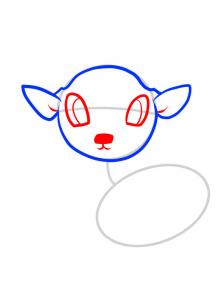
Step 3 Draw the eyes of long dome shapes and then draw the nose and a cute mouth. Look at the small detailing that I have done.
Step 4 Draw the antlers.
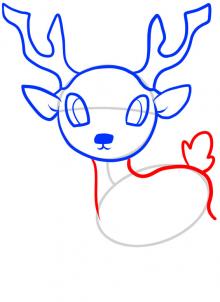
Step 5 Draw the neck and keep moving to form the body. Draw a flame shaped tail.
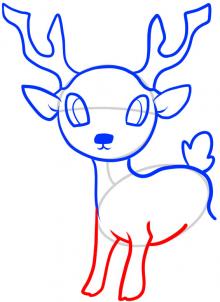
Step 6 Draw the front and hind legs.
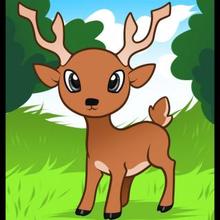
Step 7 Remove all the outlines and fill with color. Your cute little deer is looking at you. Don’t you want to hug it?

Draw Deer for Beginners
Beginners why not begin with a realistic deer only? It may be bit difficult for you but if you follow my steps carefully then you can easily do it without any trouble.
How to Draw Deer step by step?
Step 1 First draw a small oval for the head. Then we will draw outlines for the body. Draw 2 large ovals below the head with some gap in between them. Below the first oval draw 2 small ovals for the knee joints of the front leg and draw the hooves below it. Connect the joints, hooves and body to form the front legs. Follow the same technique for the hind legs also as shown in the figure.

Step 2 Draw the entire shape of the deer by following the outlines. Move along the outlines using light stroke of line until the whole body is formed.

Step 3 Remove all the outlines. Draw the triangular ears on both sides of the head. Draw the outline for the antlers with single lines. Make it symmetrical. Then work on the eyes, nose and mouth with small shapes.

Step 4 Now we complete the antlers which are of twig shape(use double lines). Give more definition to the nose.

Step 5 At last we shade the entire deer with short series of strokes all over the body to show the fur and wrinkles of skin. Keep the body portion plain to show the smooth soft skin. Your deer is free to roam in the jungle.

Steps to Draw Deer Head
You already have an idea from the previous picture on drawing a deer head. But for more details and better clarification, look at the picture given below. It will help you for a better understanding. Follow the same steps starting with the outlines and forming a general structure and then removing the unnecessary lines. At last form the facial parts and give detailing. Shade to complete your final picture.
