How to Draw Hair: So here we come to my favorite part i.e. hair. I know all of you irrespective of boys and girls are very fond of your hair. We all change our hairstyles from time to time to get a new look. We spend a lot of time and money on maintaining our hair.
- How to draw a Pokemon
- How to draw a Pikachu
- How to draw a Mouth
- How to Draw a Hand
- How to draw a Superman
- How to Draw a Star
- How to draw a Sonic
- How to draw a Basketball
- How to draw a Brain
- How to draw a Cupcake
- How to draw an Emoji
- How to draw a Kissing
- How to draw a Mouse
- How to Draw a Nose
- How to Draw a Lion
- How to Draw a Monkey
- How to Draw a Car
- How to draw a Deadpool
- How to draw a Deer
- How to draw a Doraemon
Hair is just another important facial factor which determines how your face will look. If you are so fond of your hair, so why not draw your hairstyle on a sheet of paper? It’s not a easy task if you think so. Any facial part requires a lot of concentration if you want to draw it perfectly.
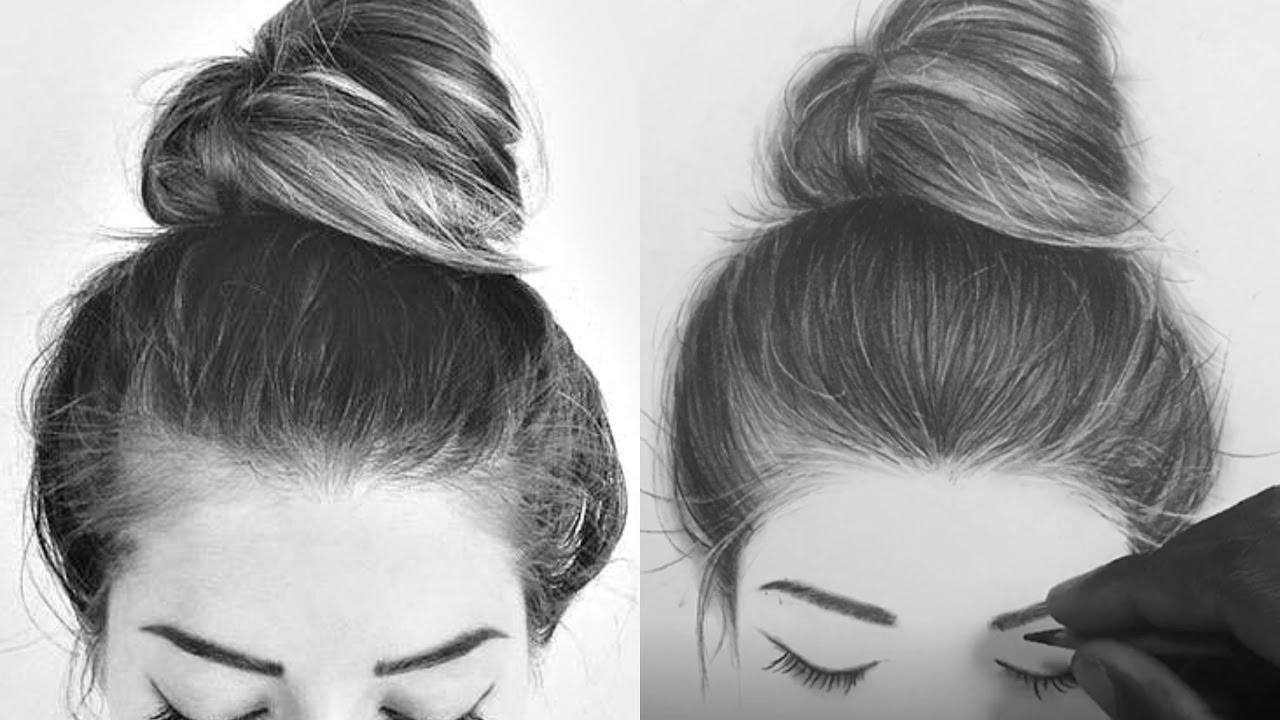
Before drawing a face, you should practice each and every facial feature. Drawing hair is the easiest as compared to other facial parts but quite important as it defines your look.
I love drawing various hairstyles because I love the variety of styles which we can print on our paper. So are you excited because you are going learn something new again? I have selected a few styles which I like the most and will be showing the techniques to sketch it.
Without wasting any further time, children go get your pen and paper and follow my steps.
How to Draw Hair easy step by step?
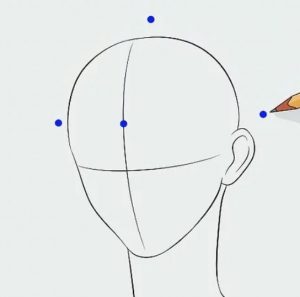
Step 1: Before drawing hair, we need to draw an outline of the head. We have to determine what portion of the head is covered by the hair. Head is important then only we can show the length of the hair like if there is no support anything would. So head acts as a support.

Step 2: Lightly draw an outline for the direction of the hair where it falls. Sometimes back of the head or else behind the ear.

Step 3: Now use a darker material to show the highest proportions of hair in your head.

Step 4: Thinner areas can be done using a pencil. Some places will remain light as they show reflections and always keep in mind not to draw each and every strand of hair but to shade it.

Step 5: Some strands will pass through the light areas or overlap with each other.

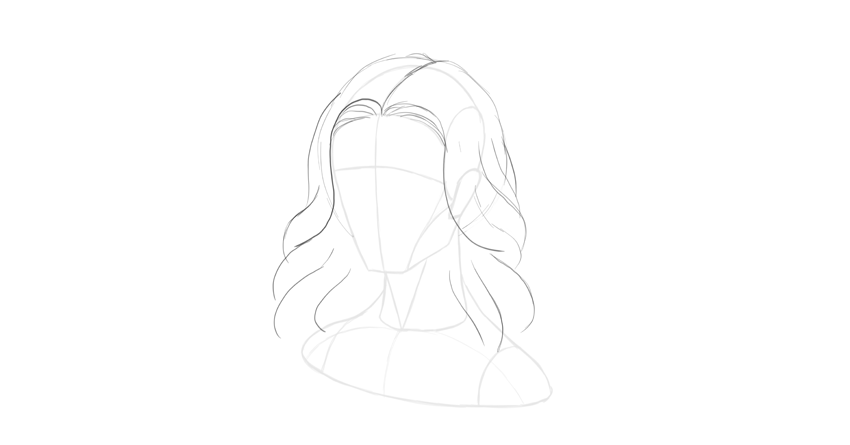
How to Draw Curly and Wavy realistic hair?
Step 1: As usual we draw an outline of the head. And now draw an outline for the haircut also as shown.

Step 2: Now draw the partition for the hair.

Step 3: Now draw the strokes covering the face.

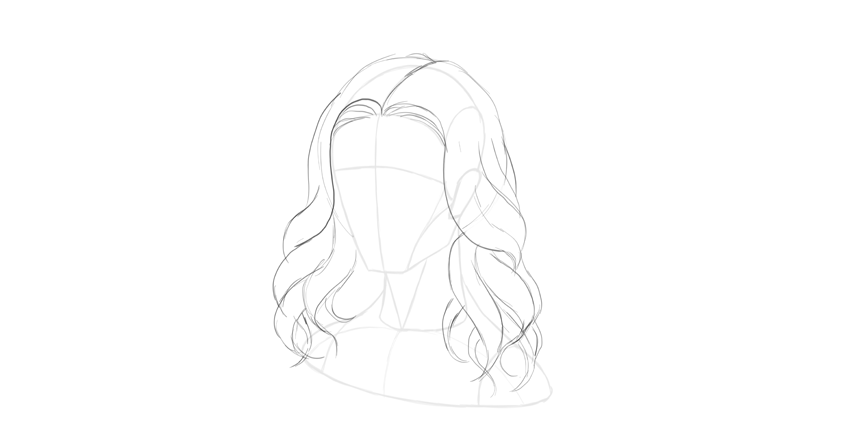
Step 4: Now try to make the hair elevated by covering the gap in the scalp.

Step 5: Draw wavy lines beside the long strands without touching them.

Step 6: Continue creating the curved lines without touching each other.
Step 7: We close the strands by making it shallow curves.

Step 8: Draw more curls at the tips of the larger curves.
Step 9: Now we draw strands on top of the head

Step 10: Lightly direct the strands all over the head.

Step 11: Give details to the strands on top of the head.

Step 12: Darken the different strands without separating them too much.

Step 13: At last, for detailing we shade the strands and blend it for smoothness.

How to Draw Straight Hair?
Step 1: Now we will start by drawing an overall shape of your hairstyle.

Step 2: Use long and dark strokes to show the length of your hair. The empty areas shows the areas where our hair bends.

Step 3: Mix the hair with a thick roll. Darken the dark areas with heavy strokes. Remove the lighted areas with an eraser.

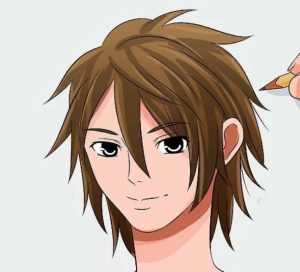
How to Draw Cartoon or Anime hair?
Step 1: Just draw an outline of the head of your favorite manga hero. We just need a basic structure without any details.
Step 2: Many manga characters have hairs which are not possible to have. So select a particular one. Then by giving dots mark the outline of the hair. The distance between the dots from the forehead to the top as well as side should be equal as shown.

Step 3: Now start giving outline to your hairs starting from the top of your head. It should be in the form shallow falling curves.
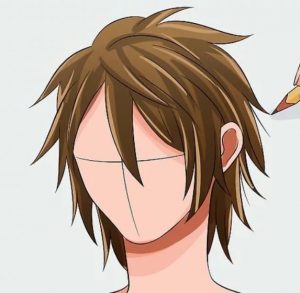
Step 4: Always pay attention to the direction of your hair. Overlap the strands and give details to it as illustrated.
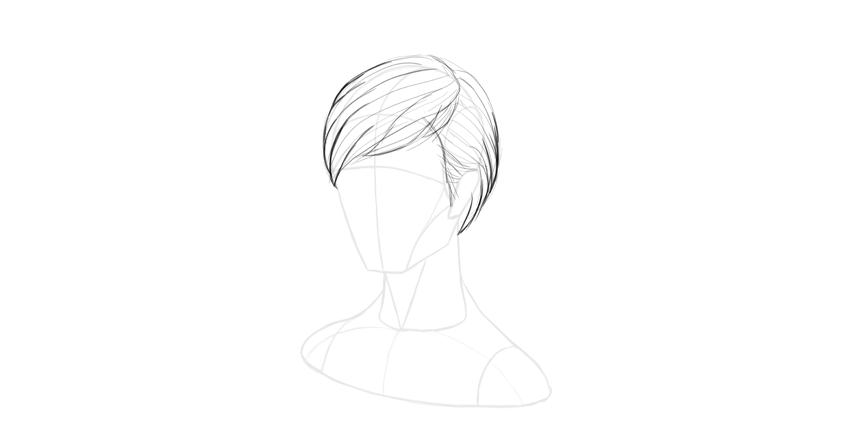
How to Draw a Male Short Hair?
Step 1: As usual we draw an outline of the head. And now draw an outline for the haircut also as shown.

Step 2: Now draw the partition for the hair.

Step 3: Next we draw the next hairline to complete the hair outline.

Step 4: Carefully give direction to the hair by thin strokes and try to create 3D picture.

Step 5: There must be some unidentified strands near the fringe. Draw their fringe.

Step 6: Darken the strands at the sides of the head.
Step 7: Now we start detailing by giving shadows in the strands as well as in the middle.

Step 8: Now we start outlining the hair with thin lines and the lines should be narrowed.

Step 9: For more details shade the strands and more hair to make it realistic.
