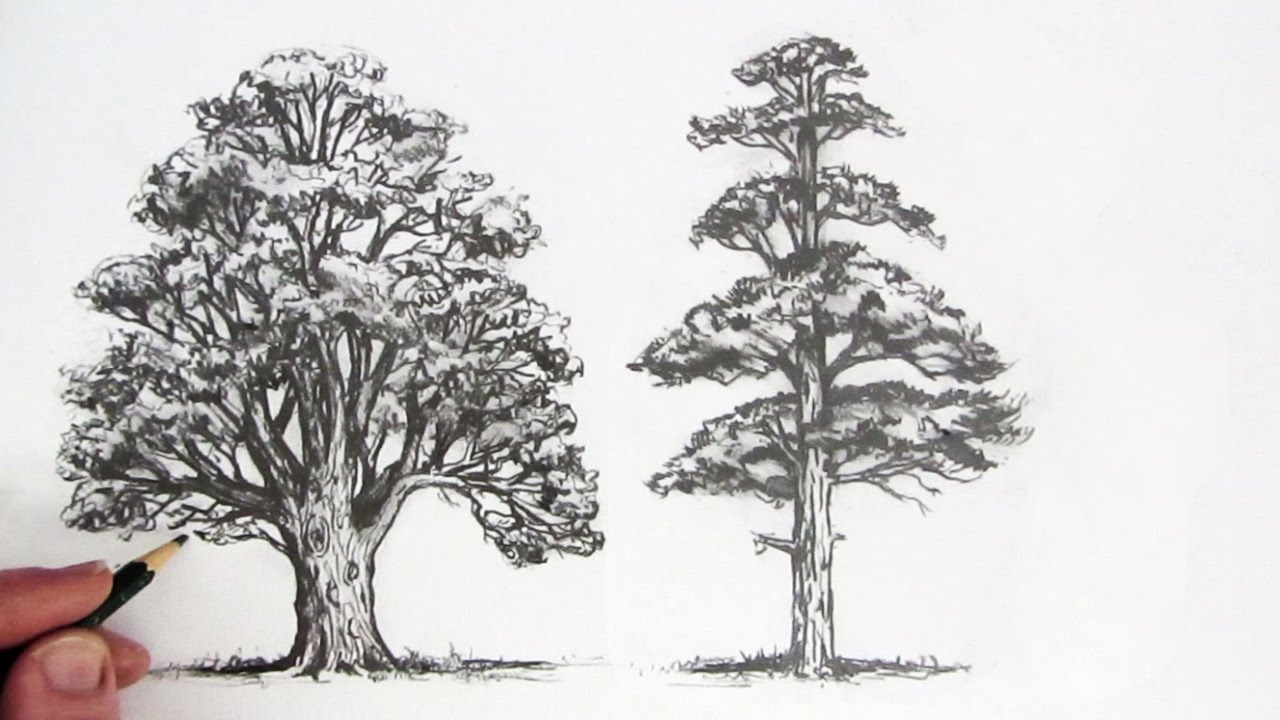
Everybody knows how to draw a tree. So what is the point of this tutorial? The main point is the detailing. Since, drawing this is easy we are concerned how to make it more realistic. You can think of various types of trees such as during the Christmas eve and draw it for further practice.
- How to draw a Pokemon
- How to draw a Pikachu
- How to draw a Mouth
- How to Draw a Hand
- How to draw a Superman
- How to Draw a Star
- How to draw a Sonic
- How to draw a Basketball
- How to draw a Brain
- How to draw a Cupcake
- How to draw an Emoji
- How to draw a Kissing
- How to draw a Mouse
- How to Draw a Nose
- How to Draw a Lion
- How to Draw a Monkey
- How to Draw a Car
- How to draw a Deadpool
- How to draw a Deer
- How to draw a Doraemon
I will also be showing various types of techniques to draw different kinds of trees.
Trees are the most important part for maintaining our ecosystem. Trees help to clean our air and provide us with oxygen. They help to clean our water and provide a cool environment. The key factor is they try to minimize the climatic change effects. Deforestation leads to global warming which further leads to melting of glaciers and which in turn causes climatic changes. The human greed has rose so much that it will adversely affect us in the upcoming future. So kids I hope you know the importance of trees. So, after learning to draw a tree, you have to go and plant a sapling in your own garden. These small steps taken by you children will help us secure our future.

Kids always be energetic and use your own creative ideas while drawing. If you find some new ways or you disagree with me, please be free to leave a comment. Now, get ready with your pencil and paper and follow my steps.
How to Draw a Tree step by step?
Step 1 In this step we draw the outline for the trunk and branches. The branches should stretch upwards.

Step 2 Always draw branches in pairs. Draw multiple small branches from the bigger branch as shown.

Step 3 Following the outline from Step 1 draw the contours of the tree and branches and complete the trunk.

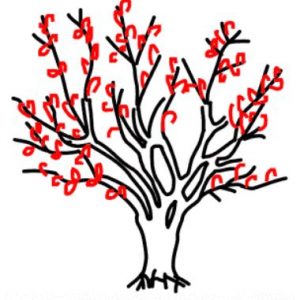
Step 4 Now fill the branches with leaves by drawing small curved lines.

Step 5 This step is difficult as we have to form the leaves. Draw small ovals for each of the lines in the previous step.

Step 6 Add some details and remove anything unwanted. Give strokes of water color to complete it.

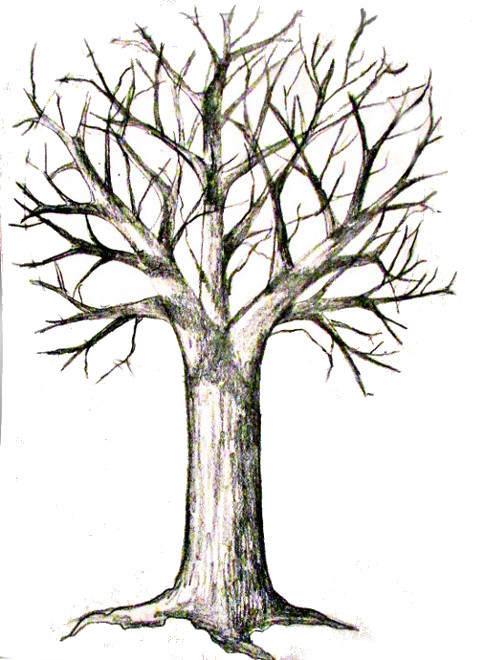
Basic Steps to Draw a Simple Tree without Leaves or Dead Tree
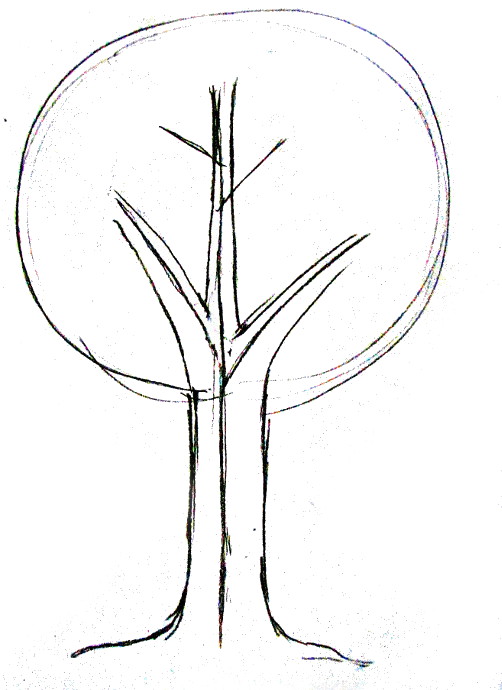
Step 1 Draw a single line for the trunk and a round shape for the crown.
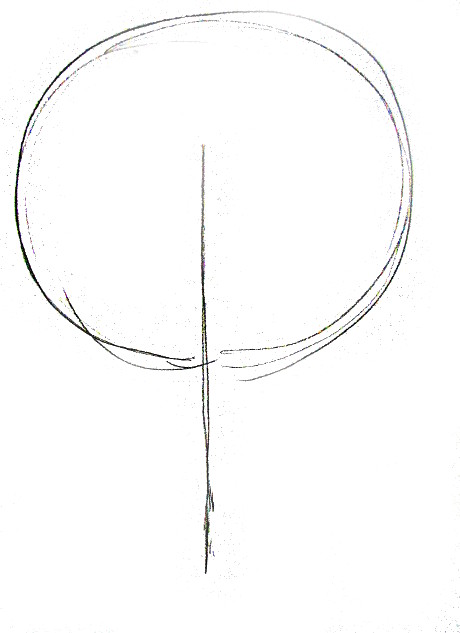
Step 2 Draw few straight lines for the branches
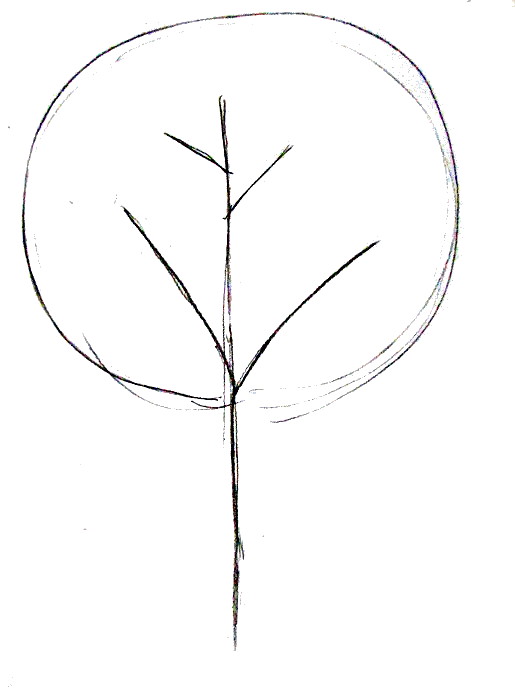
Step 3 Now we draw 2 parallel lines around the trunk to make it thicker and also draw the roots.
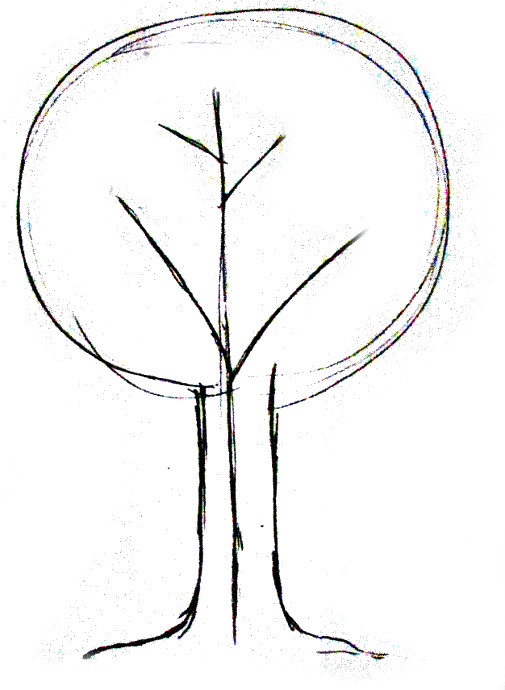
Step 3 By following the above step we also make the main branches thicker as illustrated.
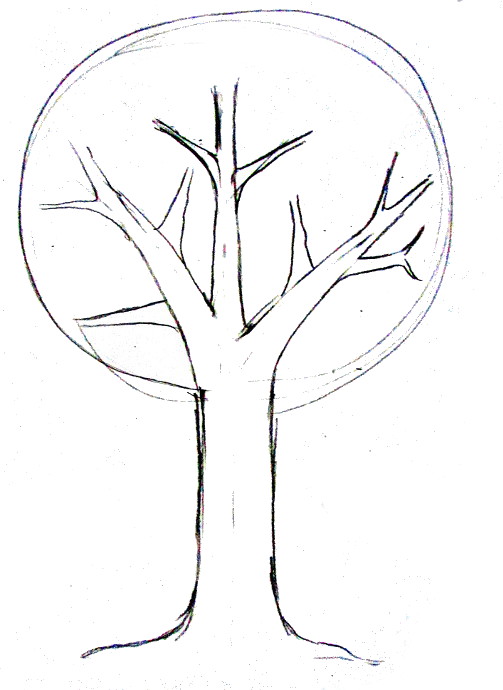
Step 4 Now we draw more sub branches from the main branch.
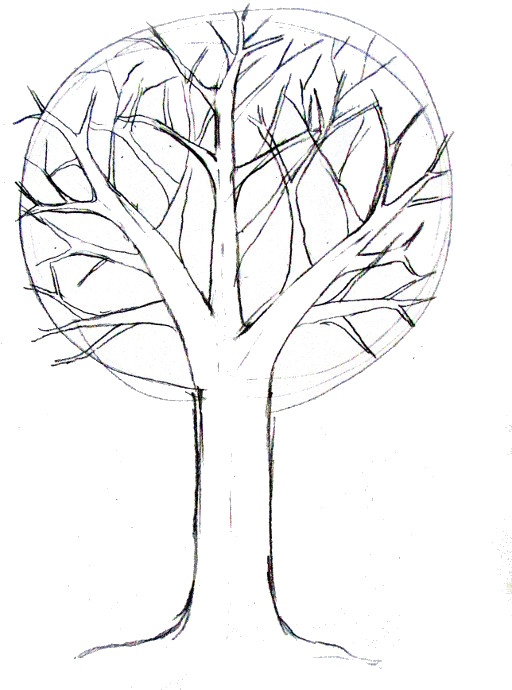
Step 5 Add more sub branches.
Step 6 Shade the trunk. The areas facing sun will be lighter and opposite the sun will be darker and remove the circular crown. Your task will be to draw the shadows of the branch falling on the ground.
Way to Draw a Christmas tree
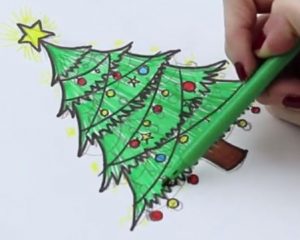
Step 1 First draw an isosceles triangle and a rectangular shaped trunk.
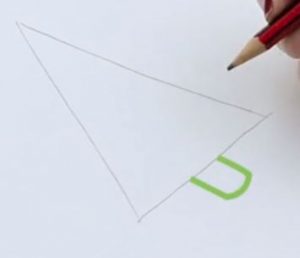
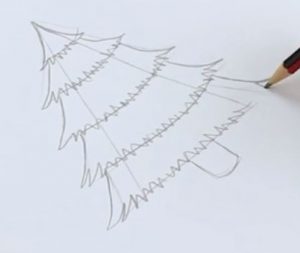
Step 2 Now we work on the body. Draw 5 curves equidistant from each other which shows the leaves from top to down.

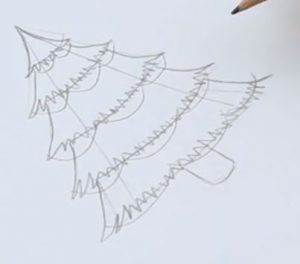
Step 3 Now we draw the leaves on the edges of 5 curves by little pointed curves.
Step 4 Make semicircular outlines on the tree where we draw small Christmas light balls which are small circles.
Step 5 Draw the Christmas star and add decorations as you wish.

Step 6 Erase the outlines and color it.
Way to Draw a Pine tree
Step 1 Draw cylindrical base where the pine tree stands. Draw two long imperfect parallel lines for the trunk as shown.

Step 2 Now draw the branches which are sharp curved lines. Longer near the bottom and shorter near the top.

Step 3 We now draw cones to show buds.

Step 4 Now surround the whole branches with small needle like lines which will form the leaves.

Step 5 Fill the branches with small needle lines to make the leaves and remove the outlines.

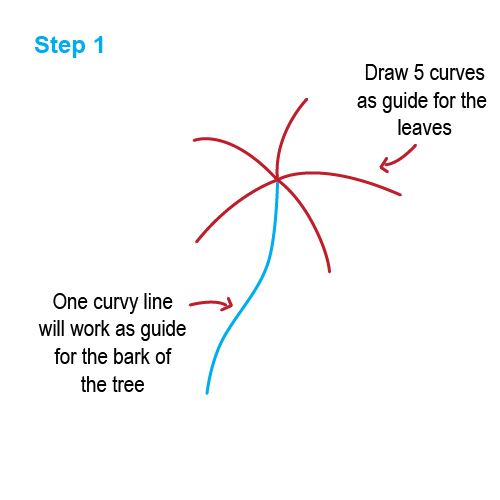
Way to Draw a Palm tree
Step 1 Draw a curved line for the trunk and five more curved lines at the tip for the outline of the leaves.
Step 2 Draw the leaves by keeping the 5 lines in between.

Step 3 Draw some extra leaves in between the main leaves.

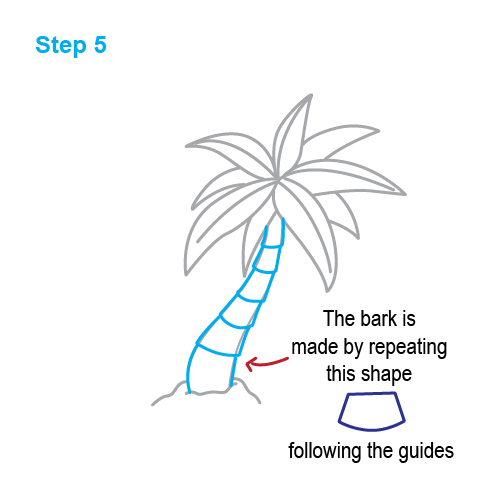
Step 4 Lets shape the trunk. Thinner near the leaves and becomes thicker slowly and thickest at the ground.

Step 5 Now we draw the bark of the tree by drawing curved lines.
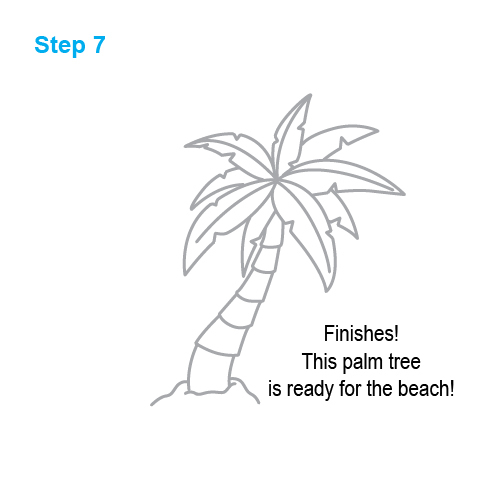
Step 6 Some detailing is done to the leaves and the palm tree is ready.
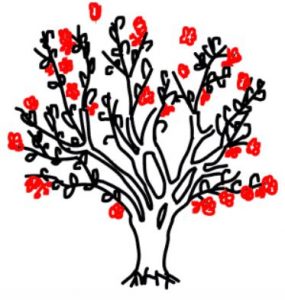
How to Draw a Cherry Blossom tree for Kids?
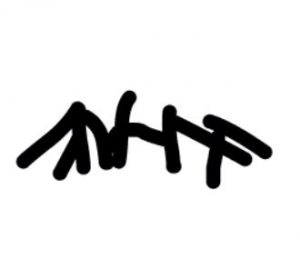
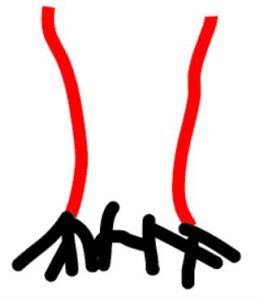
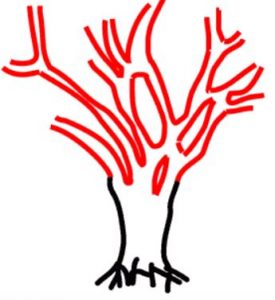
Step 1 First we will draw the roots which are upside down V’s.
Step 2 Now we draw the trunk, which is in the shape of a concave lens thin in the middle and thick at top and bottom.
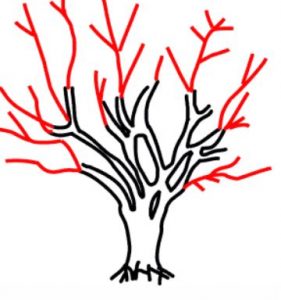
Step 3 In this step we will draw the branches of our tree. We begin from the left side of the trunk, we draw two curved lines coming out of the trunk going towards the left only. We draw more of these double curved lines coming out of the trunk in both the directions to fill it. Now we make more sub branches of V shape starting from a branch only or in between the branches.
Step 4 Now we draw the twigs that come out of our branch and they can be subdivided further. Twigs should be present on all sides of the tree.
Step 5 We now draw the leaves around the twigs and as well as some in the branches which are small oval like shapes.
Step 6 Last step is to show the cherry flowers. We draw a small circle and ovals surrounding it to form the flower. We can place as many flowers as we want in the twigs. Your cherry blossom is ready. Are you proud of your drawing? Feel free to leave a remark in the comment section.