Welcome students. Today you will be learning various tips and tricks on how to draw an owl? First we will learn some interesting facts about the owl. Owls are nocturnal birds with binocular vision and have feathers designed for stealthy flight.
- How to draw a Pokemon
- How to draw a Pikachu
- How to draw a Mouth
- How to Draw a Hand
- How to draw a Superman
- How to Draw a Star
- How to draw a Sonic
- How to draw a Basketball
- How to draw a Brain
- How to draw a Cupcake
- How to draw an Emoji
- How to draw a Kissing
- How to draw a Mouse
- How to Draw a Nose
- How to Draw a Lion
- How to Draw a Monkey
- How to Draw a Car
- How to draw a Deadpool
- How to draw a Deer
- How to draw a Doraemon
Female owls are larger than the male ones. There are around 200 species of owls. They usually hunt small mammals and insects. Found everywhere on the Earth except Antarctica. They have beaks like the hawk, large front facing eyes and a flat head.

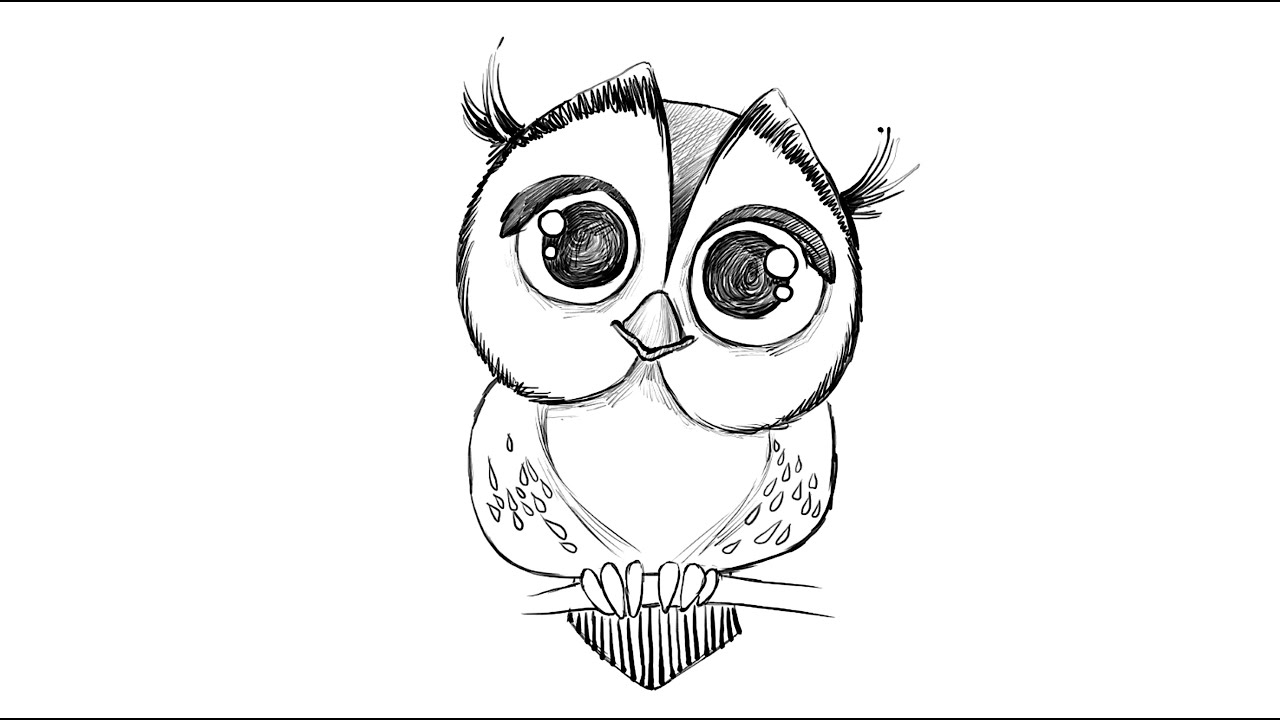
Drawing owl is a bit more tedious than the other drawings we have been doing. But you have nothing to be afraid of, because in this tutorial I will be showing you all the simple tricks you should follow while drawing an owl. It’s important to take care of small things while drawing because these will only help to make your drawing realistic. Its to good to see that you are progressing step by step. Keep on practicing various drawings that I am showing you all and I hope that one day you will become a great artist.
Without any further delay, go grab the required the materials and follow the steps carefully. First, I will be showing how to draw an owl for the kids.
How to Draw an Owl step by step for Kids?
Step 1 Draw a horizontal oval for the head of the owl and make the outlines as illustrated. Now draw an egg shaped body.

Step 2 We work with head now. Make the textures of hair in the head as shown.
Step 3 We draw the eyes of the owl which are again egg shaped. Draw fluffy eyebrows extending out of the face.
Step 4 Draw a circle in the eye for the pupil and darken it. Next make the beak which is in the shape of an upside down water droplet.
Step 5 Now we draw the body and shoulder which is again in the shape of a water droplet but mark the lining in the chest.
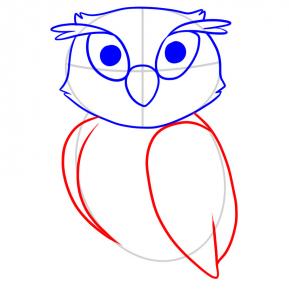
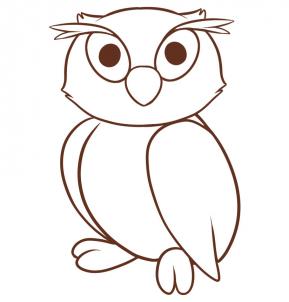
Step 6 After this we draw the feet, and remove all the outlines. Have a look at you owl kids.
How to Draw an Owl Easy?
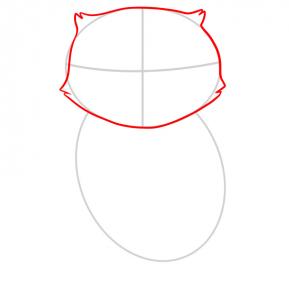
Step 1 First draw a circle for the head and a tilted egg for the body.

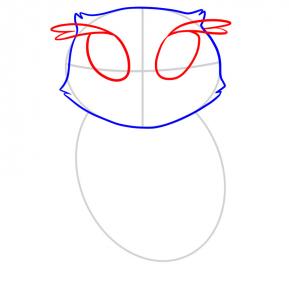
Step 2 By following the shapes in step 1, we draw the outline of the owl i.e. the feathers and some detail as shown.

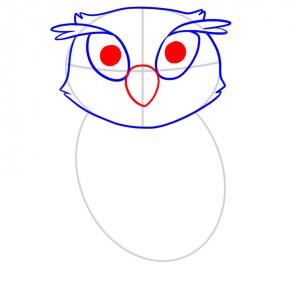
Step 3 We draw more outlines which includes the eyes and the beak of the owl as shown.

Step 4 Now we have a complete structure of the owl. So begin shading and erase the outlines on the areas that we have worked upon.

Step 5 We shade the feathers are darken them in oval shapes to make the feathers distinct. The end of the oval should be pointed.

Step 6 To define the feathers more and fill empty spaces we draw lines in the feather. And darken some areas of the feather to give it a 3D look.

Step 7 Don’t smoothen the feathers as will not look realistic then. Keep the feathers bit scratchy to look better. Darken the eyes.

Step 8 Now at last shade the chest and leg portion to indicate the furs.

How to Draw an Owl Face/Head?
Step 1 We will start by making the outlines, which should form a Y shape.

Step 2 The V shaped line will form the eyebrows, so spread it nicely. Now draw a thin shaped upside down water droplet for the beak. We will draw the eyes also which contain three concentric semicircles. Now draw the fur of the owl’s chest on both the sides of the beak by multiple small curved lines. Have a close look the picture shown below.

Step 3 Erase all the unwanted outlines and start shading the eye. Use light shading for the inner eye and darken the eye rings and pupil as illustrated.

Step 4 Shade the beak by darkening the inner edges and leave a lightly shaded area in the middle portion.

Step 5 Now we work on the face. Draw a dark region surrounding the beak and stops at middle of the pupil. Lightly shade in the empty spaces.

Step 6 In the last step we shade the forehead and the furs. Use a color blender for a smooth grayish surface. Follow the similar techniques for the chest also.

I can’t see any pictures.