Draw Smoke: The most important gut feeling of all existing living being is the gut feeling of preservation instinct. This doesn’t let zebras jump into the lake jam-packed of crocodiles, elephants do not jump into waterfalls furthermore dogs bring back thrown sticks back.
- How to Draw a Duck
- How to Draw a Hoods
- How to Draw a Graffiti
- How to Draw a Goat
- How to Draw a Knight
- How to Draw a Water
- How to Draw a Turtle
- How to Draw a Dolphin
- How to Draw a Shopkins
- How to Draw a Braid
- How to Draw a Panda
- How to Draw a Fox
- How to Draw a Soccer Ball
- How to Draw Furries
- How to Draw a Pig
- How to Draw Comics
- How to Draw a Diamond
- How to Draw a Pumpkin
- How to Draw an Animal Ears
- How to Draw an Oval
- How to Draw an Emojis
- How to Draw a Cube
However human beings become the solitary person in charge along with the only contributor in the long-drawn-out on how to exterminate him.
Smoke is the consequence of the incineration of useful elements that passes throughout our internal organs also comes out as you would expect. Smoking is the most primeval way to get exonerate of depression, to dig up lung cancer, dental caries and to give high taxes. A good number of the people on earth are smokers.
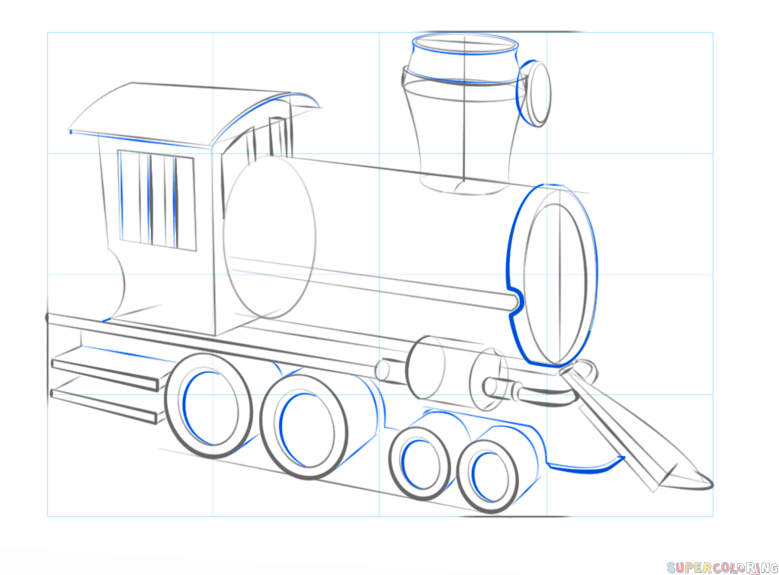
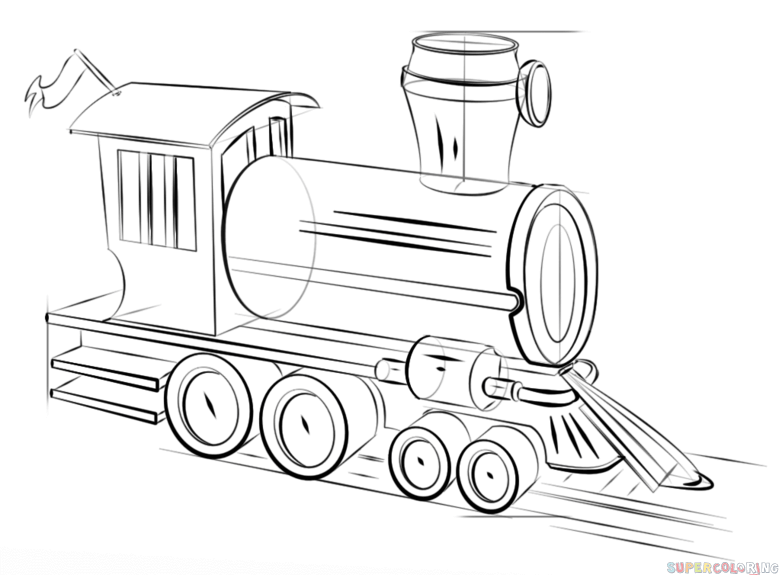
Step to Draw Smoke
- Commence by demarcation the fire. To do this, sketch a number of sets of curved outline, allow the lines to congregate in a razor-sharp point. Sketch one elongated, curved line that will almost immediately turn out to be the center of the flame.
- Pencil in extra licking flames, over again by means of curved lines of an assortment of length. Allocate the lines to get together in sharp points.
- Append supplementary flames to the foreground of your sketch. Bring into play curved lines of unlike lengths; allow the lines to convene in sharp points.
- Carry on drawing flames with sets of tiny, curved lines. Consent to every set of lines to meet in a sharp point.

- Draw bits of flame as well as ash intensifying from the fire. For each spark, sketch two petite, curved lines, enclosing a figure that is sharp on each side.
- Portray a lot of more sparks, enclosing pointed shape by means of curved lines. Addition to these shapes, draw little circles or else dots of ash. Furthermore sketch short, curved lines above the flames, demonstrating the high temperature rising from the fire.
- Depict a cloud of smoke. To do this, enfold a lopsided, smoothed shape above the fire by means of a series of linked, curved lines.
- Pencil in another, lesser cloud of smoke floating above the fire. With a progression of connected, curved lines, hem in an uneven curved shape.
- Enclose a small number of additional little vapors of smoke, by means of linked, curved lines. Sketch a few more dots of ash in the middle of the smoke.
- Shade your fire. Smoke may perhaps range from white steam to shades of black and grey. Fires are usually seen as yellow, red, along with orange in color.


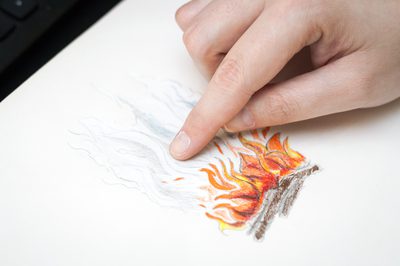
Step by Step Draw Steam
Shade in the region of the thing with the intention of you want to be “steaming” to generate a plain field of color, Mix together well uses a chamois, tortillon or your fingers, despite the fact that your fingers will leave print which may show up in the picture.
Without due consideration draw a small number of S or C-shaped curves above the thing that is steaming. Steam has a vague shape, so this give you an opportunity to show your creativity and make the work easy for you.
Make certain that the curves are in general going upwards if not it is windy or the object is moving. These lines are to help you chart wherever you would like to position your steam.
Flippantly rub out the region over in addition to ground the guide lines, moving up and down by the side of the lines. A number of areas resolve to be darker and lighter, which is enviable.
Shade flippantly in the region of the external boundaries of the eraser ‘steam’ to craft it stand out further more. If wanted, make use of a white pencil or else use a chalk to compose the steam to some extent whiter.
It is helpful when particularly you find the graphite quantity is more in your paper as compared to what you expected, and then this technique can help you.
How to Draw Smoke Easy
Smoke has furthermore been position to make use of by humans. For centuries, smoke signal have been used as a way of long distance communication and to contact those who are far away. Case in point, alongside China’s Great Wall, soldiers make use of smoke to caution of approaching dangers. Very soon in hardly any hours, fires possibly will be lit alongside the wall, hauling the message as to a large extent as 470 miles (750 kilometers). Inhabitant Americans plus the very old Greeks also make use of smoke signals to communicate messages. Even these days, particular smoke is used in the Vatican in Rome, Italy to indicate whether new popes have been elected.

Both flames and smoke be the outcome of a chemical reaction called rapid oxidation. In this rejoinder, molecules of oxygen are wrecked apart, producing heat. The stuffing of the material being burned take part in a role in shaping how burning the fire is in addition to the color of the conflagration and smoke. If the substance has water in it, it will create white smoke, at the same time as fuel, paint plus other chemicals turn out dark smoke.
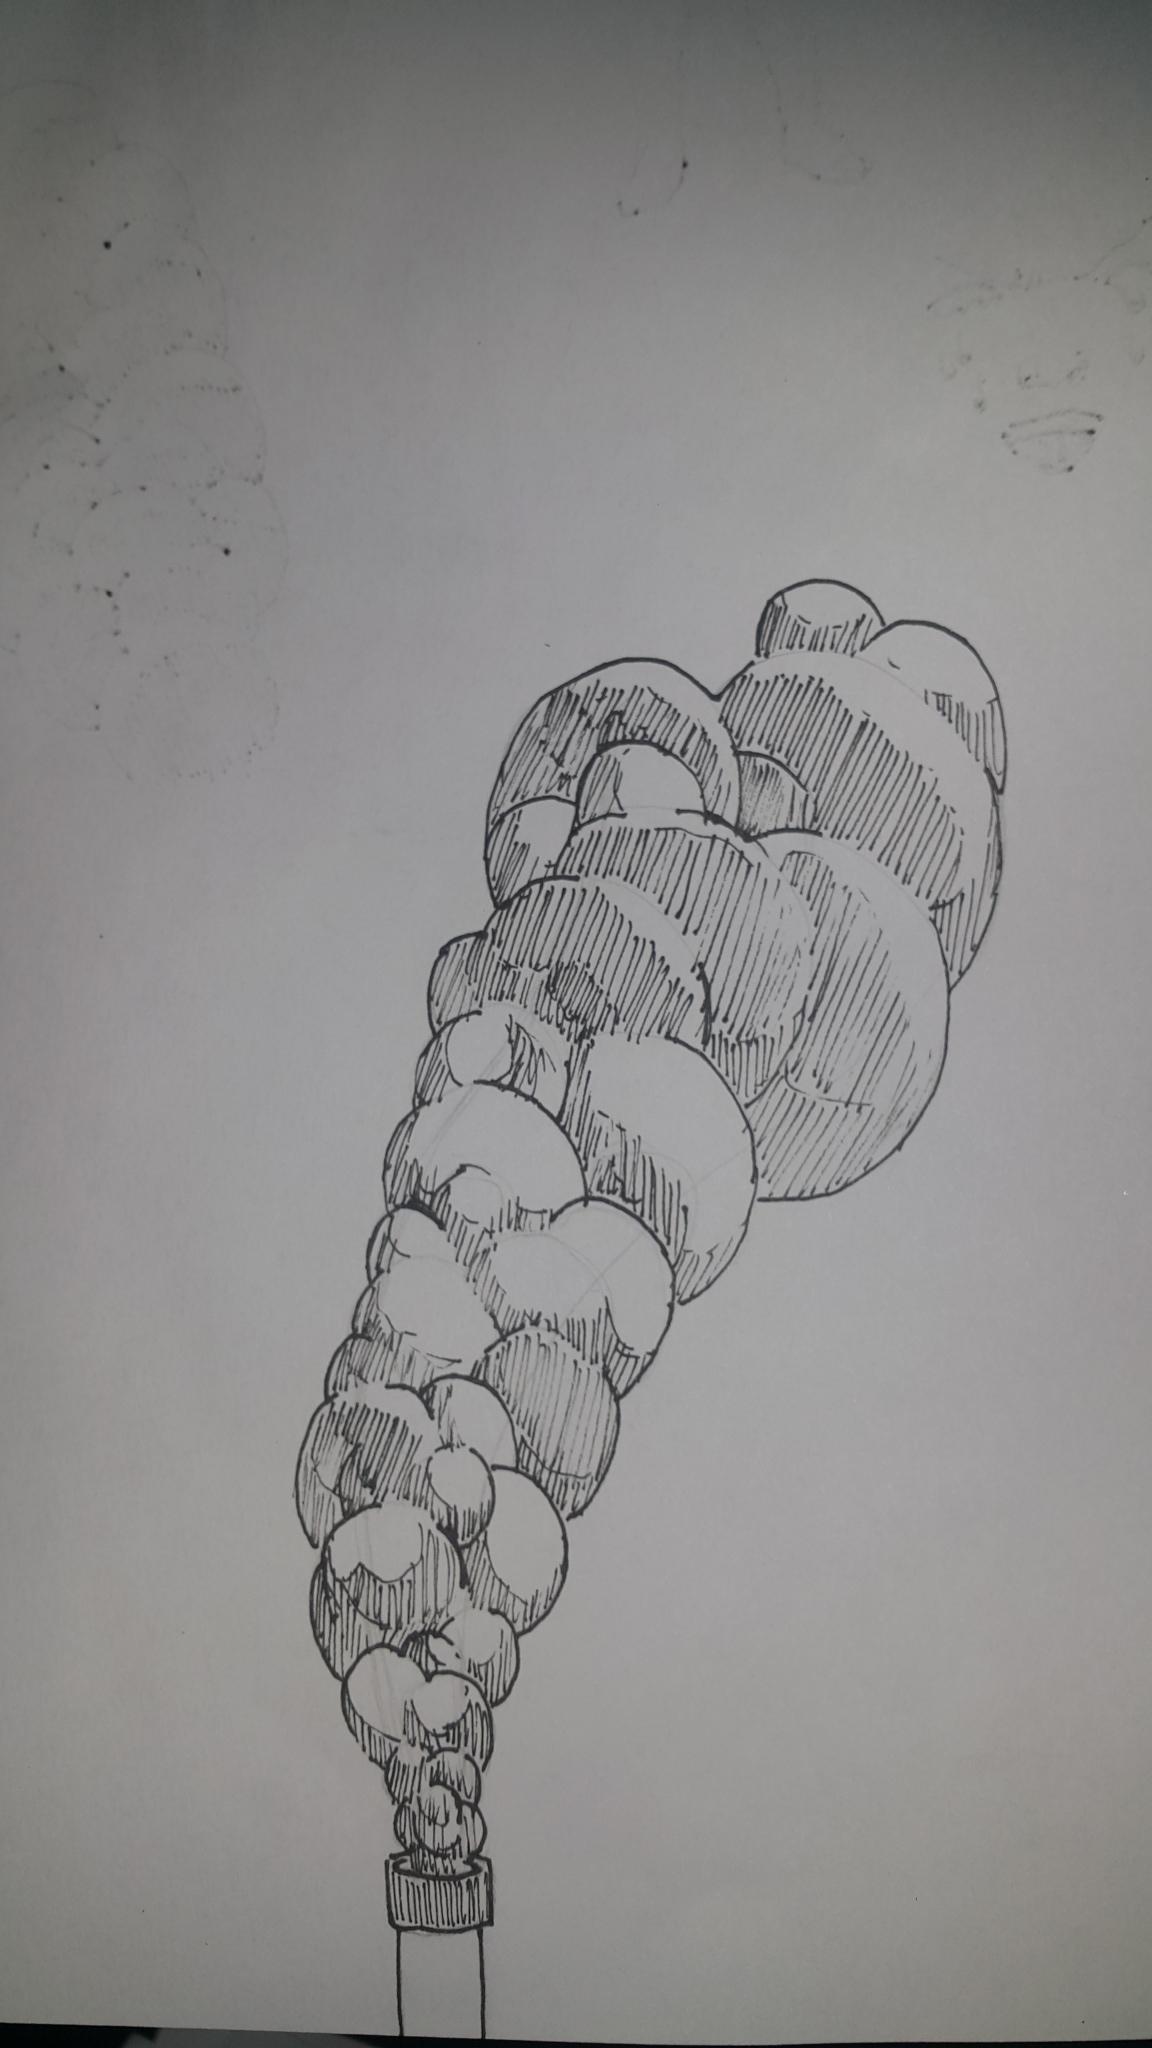
Draw Smoke Clouds
You can draw the smoke clouds by following the steps given below:
- Utilize a solid pencil to outline the figure of a cloud extremely lightly, sketch a small number of intersecting ovals in a variety of sizes.

- Pencil in a shabby sketch of the cloud going in the order of the outline suggested by the ovals.

- Slope your pencil to sketch with a side of it. Pull it all in the region of the cloud, wrapping the background by means of gray. Don’t shove too solid, and try to make consistent strokes.
- Make use of your blending instrument (blending stump, finger wrapped in a tissue, cotton swab) to bring together the strokes. Attempt not to spoil the general sketch out of the cloud.
- Get a softer pencil and do again the previous two steps. Once more, don’t force down too hard—you can’t intermingle something that has been pushed deep into the paper!
- Catch an eraser, make definite it’s dirt free (“erase” a extra portion of paper to do away with filthy portion), and cautiously “sketch” tattered parts of the cloud. To maintain them white, dirt frees the eraser from time to time or rotates it to make use of a cleaner bend.
- Take the softest pencil furthermore adjoin a number of darker strokes exact behind the sketch out. Intermingle it as well.
- Take a solid pencil along with sketch the outline of the shade area.
- Shade the shadow region, slanting the pencil.
- Mix together the shadow, trying to reside surrounded by the outlines of the cloud.
- Insert tiny shadows in the light region and blend them.
- Take the eraser furthermore make use of it to construct the border between light and shadow clearer.
- Take the softest pencil as well as make use of it to construct the outline extra striking.
This way you can make and easily draw the smoke cloud.
How to Draw Smoke With Charcoal
Sketching with the charcoal is the well renowned skill. A professional look can be given to any image with the help of just a tiny chunk of charcoal and eraser. This is much similar to making the abstract photos without using the computer or technology. A number of people wonder how the images have been made with just a piece of charcoal and eraser.

You can draw smoke with charcoal by using your creativity. As charcoal drawing is not so easy, it would be better if you start with easy drawings and make sure to take some seniors help. It requires a lot of effort, as a little mistake can make futile the whole work.
You can place down a light film of charcoal in the region you desire and then make use of a rubber eraser (dabbing it, not rubbing it) to lighten areas of it. This is the easiest way, you can try this.
Or also you can get your hands on a cotton ball along with add a quantity of dust from the charcoal on top of it then bring into play the cotton ball lightly to create the smoke.

One more way, you can all the time make use of water on it too. If you put some down after that drenched it similar to how you would do with water color furthermore move it around, the charcoal dust will be in motion and straighten out in new and more random areas. Of course try it on a scrap piece of paper first and if you are able to implement it properly then you can move to the real diagram.